2014 Fall Fair

This weekend was our small community’s annual Fall Fair.

The fair kicked off Friday afternoon with midway rides, some entertainment on the stage, and fireworks.  We are lucky that we are able to enjoy the fireworks from our back yard.

midway

View of the Midway from our backyard.

fireworks

Saturday morning was the annual parade.  As you can tell by a lot of the parade entries, the theme of this year’s fair was. “the Year of the HoneyBee”.

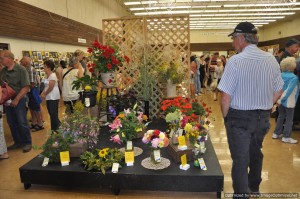
After the parade, it is tradition to head to the hall to look at the exhibits and see what prizes our family members have won.  This year, our daughter entered 5 items in the baking and craft sections and took home 4 first places and 1 second place which gave her $24 in prize money and a $20 gift certificate from Bernardin.  I entered 6 quilts and took home 6 first places, earning $27 in prize money.  There was quite the debate in our house over who took top honors and whether the $20 gift certificate should be included in the total tally.

DSC_0639

DH having a look at the exhibits.

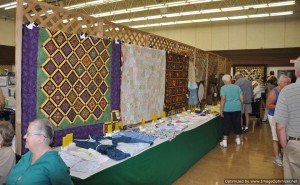
DSC_0634

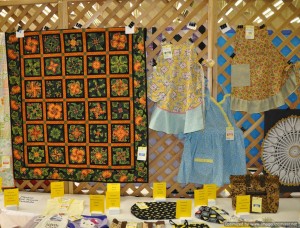
The Quilt and Sewing Section.

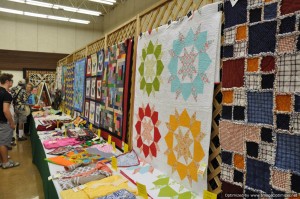
DSC_0638

More exhibits.

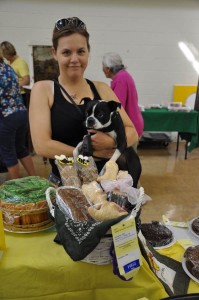
Dana with Baking

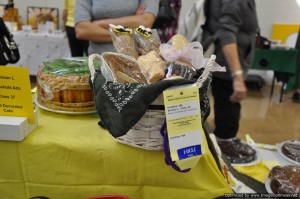
DD with her gift basket entry.

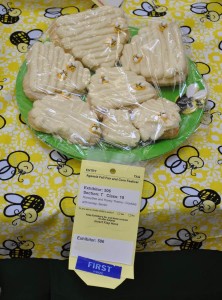
Dana's HoneyBee and Honey Theme - Cookies with honey

DD’s HoneyBee themed cookies.

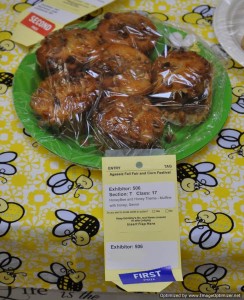
Dana's HoneyBee and Honey Theme - Muffins with honey

DD’s HoneyBee themed muffins.

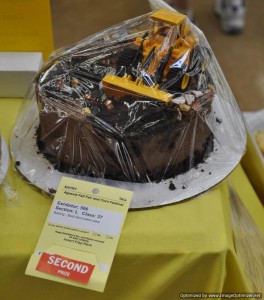
DSC_0627

DD’s cake.

Dana's Baking - Gift Basket with 4 baked items

DSC_0632

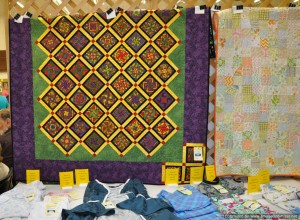
My quilt on the left – Mexican Tiles.

DSC_0633

My quilt on the left – Pumpkin Patch.

The quilt blocks for both Mexican Tiles and Pumpkin Patch are made using the technique in HD Design’s quilt pattern, 4-Patch Stacked Posies.  The setting of the blocks is my own design.  Mexican Tiles was quilted on my long arm using the Loricircles’ Swirls pattern board and Pumpkin Patch was quilted on my Bernina using vertical lines spaced about every 1/2″ or so.

DSC_0635

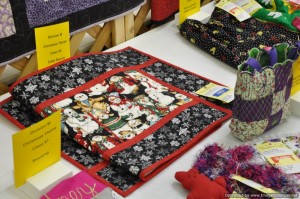
My Snowman Table Runner.

My Snowman Table Runner is made from the Designs to Share With You pattern, It’s Fast, It’s Easy.

DSC_0636

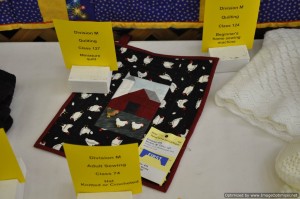
My Miniature Quilt – Chickens in the Farm Yard.

My Chickens in the Farm Yard quilt is made from a paper piecing pattern that was in a Miniature Quilts magazine years ago.

DSC_0637

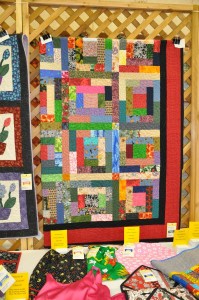
My quilt – Crayon Box.

My Crayon Box quilt is one of Bonnie Hunter’s free quilt patterns by the same name.

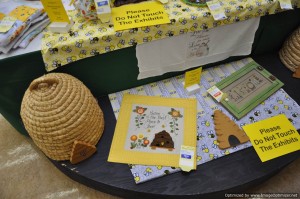
Norma's HoneyBee and Honey Theme - Needlework Picture

HoneyBee Themed Challenge.

Norma's HoneyBee and Honey Theme - Needlework Picture - Large

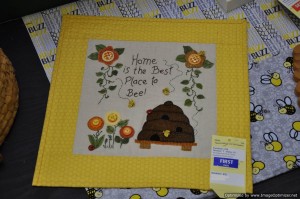
My quilt – HoneyBee Themed Challenge – Home is the Best Place to Bee!

My HoneyBee challenge quilt was made from an out of print pattern that I picked up at a quilt show garage sale table for 25 cents earlier this Spring.  The pattern is called, “Bee Home Pillow – 105” from Bird Brain Designs.  My quilt measures 17.5 inches square.

DSC_0646

Sarge – DD and DSIL’s dog.

My husband and I were able to puppy sit for the evening on Saturday night while our daughter and son-in-law attended a wedding.

DSC_0655

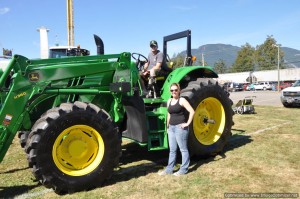
A Deere family.

Our son-in-law is a John Deere fan so I couldn’t resist taking a “family” picture with the tractor.

By Sunday morning when we got up, almost all evidence of the fair was gone.  The Midway had packed up and moved on and all the tents and exhibits were removed from the field behind our house.  This year’s fair is now only a memory.  …looking forward to next year!

My Newest Redwork Project

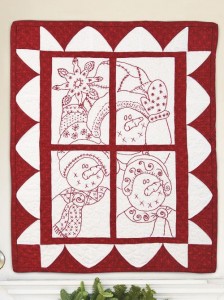
My newest red work project is, Snow Happy by Pearl Louise Krush.  The pattern was in the Holiday 2013 issue of The Quilter Magazine.

magazineThis is a picture of the finished quilt from The Quilter magazine’s site.

snow happy


I am trying something new with this project–Sticky Fabri-Solvy from Sulky.  This product is a self-adhesive, fabric-like, water soluble stabilizer.

solvy


I ordered my product from Bird Brain Designs a while ago and I was anxious to try the technique described on their site. (http://www.birdbraindesigns.net/sticky-fabri-solvy).  From the Bird Brain Designs site:

Do you hate to trace designs for your needlework projects?  We have the solution for you – Printable Sticky Fabri-Solvy from Sulky!  Print your design with your copier, stitch your design and dissolve the film away in a generous amount of warm water…EASY & ACCURATE.

Sticky Fabri-Solvy is a printable stablizer film in a full 8 1/2″ x 11″ size making printing more accurate!  Just print your design on your home copier/printer right onto the sheet of Sticky Fabri-Solvy.  Copy your design onto the “film” side of the Sticky Fabri-Solvy.  Peel the paper backing away and finger press the printed film directly onto your fabric.  Add your embroidery hoop and get stitching in just minutes!   The easiest, fastest way to transfer designs for embroidery, applique and needle felting.

Remove the film easily from your finished embroidery.  (See the photo above.)  Place in your sink with running warm water adding a generous amount of warm water.  You can “swish” your embroidery with your hand to hasten the dissolving process.  I run clean water from the faucel over my design and dry flat on a bath towel.

Stitch as usual following the design on the printedSticky Fabri-Solvy.  EASY!  We tried it for RedWork embroidery on muslin and on wool for Needle Felting and Embroidery.  When your stitching is completed, cut away excess Sticky Fabri-Solvy and soak the project in warm water to melt the remaining film away…..NEAT.

Sticky Fabri-Solvy is a full 8 1/2″ x 11″ so it fits into your copier paper tray perfectly making printing quick and easy and accurate.

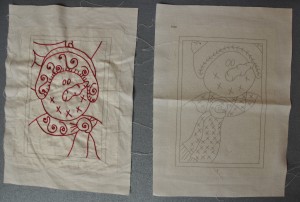
2014_Jan29_Snow Happy Redwork
This image is my project.  The block on the right is my Kona White fabric with the design photocopied to the Sticky Fabri-Solvy product.  The block on the left has been stitched.  It is a bit wrinkly now as I found the stabilizer added enough body to the fabric that I didn’t need to hoop my project for stitching.  It does mean however, that my project gets a bit wrinkly.  🙂  Removing the Sulky product from my finished project was easy.  A little water in the sink and a bit of agitation and it was all gone!

I used DMC’s perle cotton No. 8 in colour 498.  I love the perle cotton–no more separating floss threads–you can use it right off the ball.  When I was in AZ, I found a new perle cotton thread by Presencia (No. 16).  This product is finer than the DMC that I used in this project.  I am planning to use it in a more detailed design where a thinner thread than the DMC perle cotton would be more appropriate.

For reference, I found the following video on You Tube that describes how to use the Sulky Fabri-Solvy product:  “How to Transfer and Stabilize an Embroidery Pattern”.

In a second video, the deisgner describes and illustrates using a stabilizer–Pellon Designer’s Lite–to the back of your embroidery design.  The stabilizer in this video is ironed in place, stays on the back of the design, and does not wash away.  I have not yet tried this but I want to hang onto this information for future reference, so here it is:  “Embroidery How to for Quilt Pattern, I Believe in Snowmen by Bunny Hill Designs”  This video is also a great resource for how to get started with red work.


April Snowman BOM

This is my April Snowman blue work block of the month. As you can see I am behind–this is April’s block and I should be working on July. I have some catching up to do.

Yes, this snowman is blind. I am adding beads for eyes after the blocks are finished, assembled into the quilt top and quilted.

February Goals Met

I am happy to report that I have met my goals for February!

My first finish is my February bluework snowman. As you can see, he is currently blind and buttonless. I have discovered the most wonderful beads and so I have given up on the French knots. I will add the beads after the blocks are finished, assembled into the finished top and quilted. It is much easier to deal with embellishments after the quilting is finished.

I have not yet pressed this block because I am still looking for the perfect stain remover that will remove some stains near the snowman’s head (they don’t seem to show up in the picture, but believe me, they are there). I have been successful in fading the stains, but not in totally removing them. I have tried everything I can think of including rubbing alcohol, lemon juice, the Tide pen, the bleach pen, and some solvent based stain remover. Nothing wants to to totally remove the stains. I must be more careful on my next blocks to make sure I don’t end up with more mystery stains.

The second finish for February is my Double Four Patch quilt. The last stitches were taken on the binding tonight. I quilted this one with Circle Lord’s Zig Zag / Wave template.

I tried a new batting in this quilt by the Warm Company. The batting is an 80/20 blend and is so light and soft compared to Warm and Natural. It also shows off the quilting nicely. I am going to be using this batting again!

January Snowman Block

This block is from my list of projects (see side bar) that I want to finish this year. This is from #4 on the list. …..just 11 more blocks to go–one per month for the year.

I have to work hard to catch up to Linda J as she is working on the month of May already! I hear that Pam has also joined us and will be starting work on her blocks soon.

This is my first attempt at red/blue work and I think I am hooked!