FVMQG Robert Kaufman Modern It Up Challenge

DSC_0593-Optimized


Today it started to snow.  This is the first snowfall that we have seen here this winter.  We have been under an extreme weather warning since last night.

Winter Storm, Gorgon formed over the Northwest Sunday, and in a mere 48 hours it is expected to bring a swath of snow more than 2,000 miles long from the Cascades and Northern Rockies across the Midwest and into the Northeast through Tuesday. (from The Weather Channel)

So while the snowflakes fell outside, I was inside sewing.  Today was a perfect day to work on my FVMQG Robert Kaufman Modern It Up Challenge.  Our finished quilts will be part of an exhibit that our guild has planned for the Creative Stitches Show in March 2015. The theme of our challenge was to take a traditional block / quilt design of our choice and make it modern.

We were given a package of fabrics to work with that included Kona solids in Pewter, Limelight, Pool, Watermelon, Cerise, Goldfish, and three prints from Carolyn Friedlander’s Architextures line.  We were permitted to add fabrics to this selection as long as they were from the Kona solids collection or the Architextures line.  I ended up adding four additional Kona solids to the mix in Snow, Crocus, Flame, and a yellow that I don’t remember the name of.

I deliberated for weeks on what I was going to do.  I have changed my mind several times.  I started out thinking I would do a modern Log Cabin and then switched to a Dresden Plate after seeing some inspirational photos on the Internet. I then switched to the idea of a Rail Fence after I picked up the latest issue of American Patchwork and Quilting and was inspired by an article by Jean Wells.  I dropped the idea of the Log Cabin as I thought for sure someone else would do that one as wonky log cabins are very popular in the Modern Quilt World right now.  I abandoned dresden plate after hearing several guild members talking aobut making that design.  I thought I might have too many fabrics to work into a successful Rail Fence and so I also abandoned that idea.  Last night I settled on the Tumbler quilt idea.  A Tumbler quilt has been on my bucket list to make for a while now.  I found several photos of modern versions of Tumbler quilts on the Internet and this morning I worked my way through several versions making test blocks with fabrics I already had in my stash. Those versions just weren’t working for me and I was about to abandon the idea altogether when my friend, Linda J sent me a link to a video on the Internet from the Missouri Star Quilt Company for the Tipsy Tumbler Quilt.  Now this quilt was definitely speaking to me!  I started working on the blocks right away and by evening, I had all my blocks made and arranged on my design wall.


DSC_0599-Optimized

These are my Tipsy Tumbler quilt blocks.  This quilt should finish around 36″ square which will put it at the maximum challenge quilt size of 144″ in perimeter.  The contrast is very low for the Architexture print that looks like ledger paper.  If I was making this quilt for me and not for the challenge, I would have left that print out of the mix.  However, one of the rules of the challenge was that you had to use at least one piece of each of the fabrics we were given so I had to use it somewhere in the quilt.  Some of the other quilters in the Guild were using that fabric as one of their backgrounds.  However, it doesn’t work as a background in my quilt as I would loose the effect of floating the tumblers across the quilt top if I used it as background in some of my blocks.  So I will have to come up with something to help make those blocks stand out when it comes time to quilt this top.  I guess using the more difficult fabrics from the bundle is part of what makes this a challenge.

Guild Quilt Show

Our quilt guild’s bi-annual show was this past Friday night and Saturday (October 17 and 18, 2014).  I was once again on the committee that hung the quilts.  We were very organized this year and had the quilts hung in record time.

I was also doing demos again this year. Unlike some other quilt shows, our guild does not just do demos at specific times during the show.  Our demos are on-going through the whole show.  This means that the people that are doing the demos are doing lots and lots of talking.  🙂  There were four of us doing demos this year.  We had the most perfect spot with perfect lighting against this bank of windows.

DSC_0938

This was my home for a day and a half while I demonstrated how to make string/crumb blocks using a stabilizer.  I use used color catchers as my foundation, but any other stabilizer product such as muslin or paper could be used.  If you use paper, you will have to remove the paper before quilting your quilt.  This is one reason why I use the color catchers–there is nothing to remove; the color catcher is not removed and stays in the quilt.  Granted the quilt is a bit heavier because of the additional layer.

The woman doing demos beside me was demonstrating another technique for using up scraps–making those fabric wrapped bowls that are so popular now.  We were very complimentary to one another with our demos as we were both showing how to use up scraps that some people put would put in the trash.

The quilts that I entered in this year’s show were:

~Yin and Yang

DSC_0575DSC_0577 DSC_0576

~Mexican Tiles

DSC_0619 DSC_0620 DSC_0621 DSC_0622

~The Pumpkin Patch

DSC_0583 DSC_0584

~Christmas Corners

DSC_0812 DSC_0813

~Home is the Best Place to Bee

DSC_0883


And lastly, my entry into the challenge for this year’s show; Roses are Red, Violets are Blue.

DSC_0872I was very tired by the time I got home after quilt show take down last night.  …but ask me in two years if I am ready to do this again and my response will be a definite, Yes!!!


2014 Fall Fair

This weekend was our small community’s annual Fall Fair.

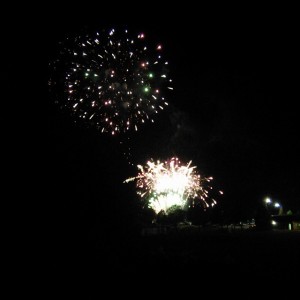
The fair kicked off Friday afternoon with midway rides, some entertainment on the stage, and fireworks.  We are lucky that we are able to enjoy the fireworks from our back yard.

midway

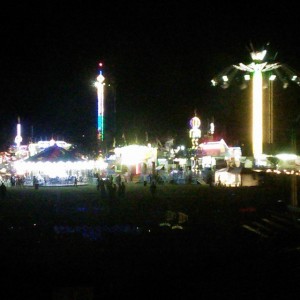
View of the Midway from our backyard.

fireworks

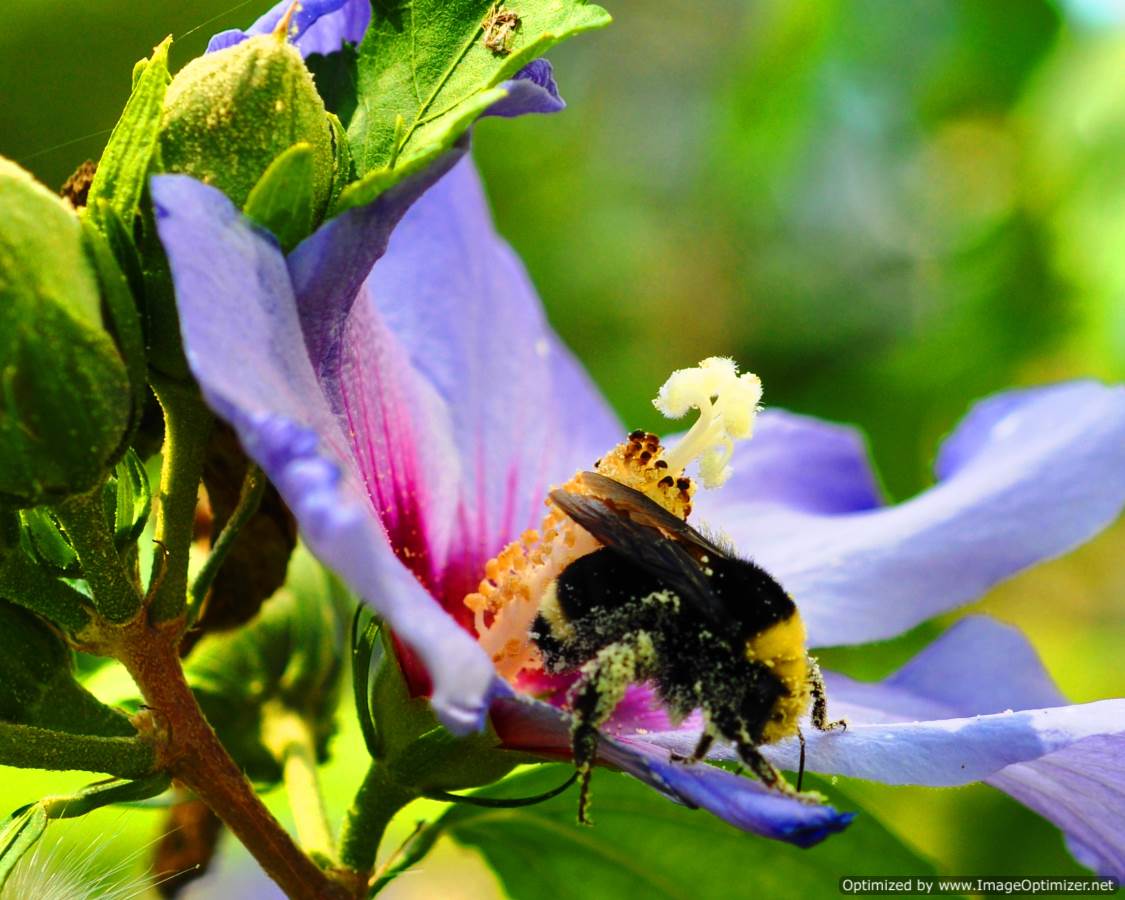
Saturday morning was the annual parade.  As you can tell by a lot of the parade entries, the theme of this year’s fair was. “the Year of the HoneyBee”.

After the parade, it is tradition to head to the hall to look at the exhibits and see what prizes our family members have won.  This year, our daughter entered 5 items in the baking and craft sections and took home 4 first places and 1 second place which gave her $24 in prize money and a $20 gift certificate from Bernardin.  I entered 6 quilts and took home 6 first places, earning $27 in prize money.  There was quite the debate in our house over who took top honors and whether the $20 gift certificate should be included in the total tally.

DSC_0639

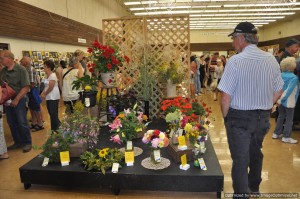
DH having a look at the exhibits.

DSC_0634

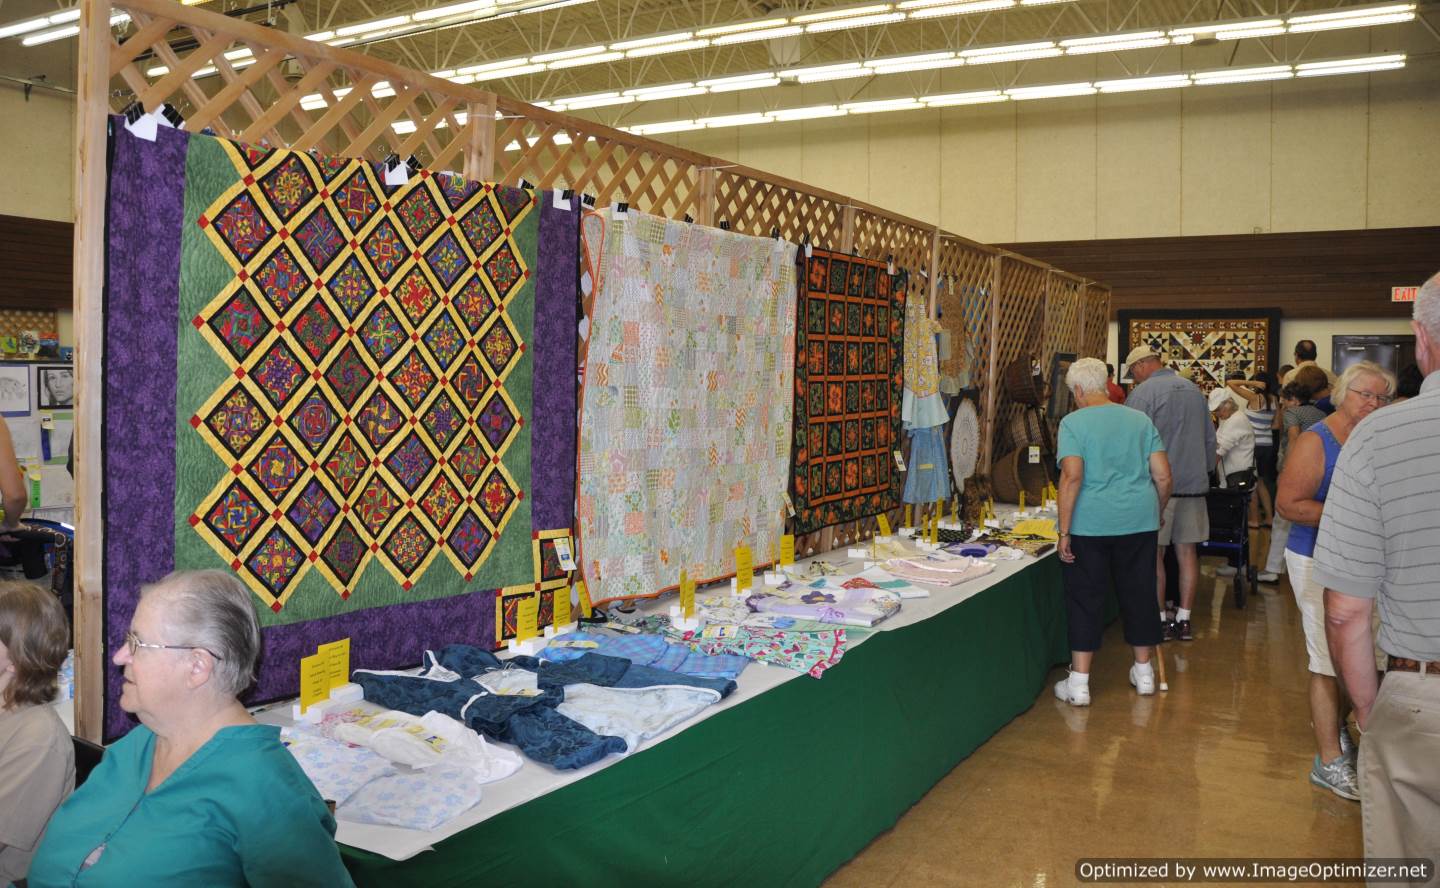
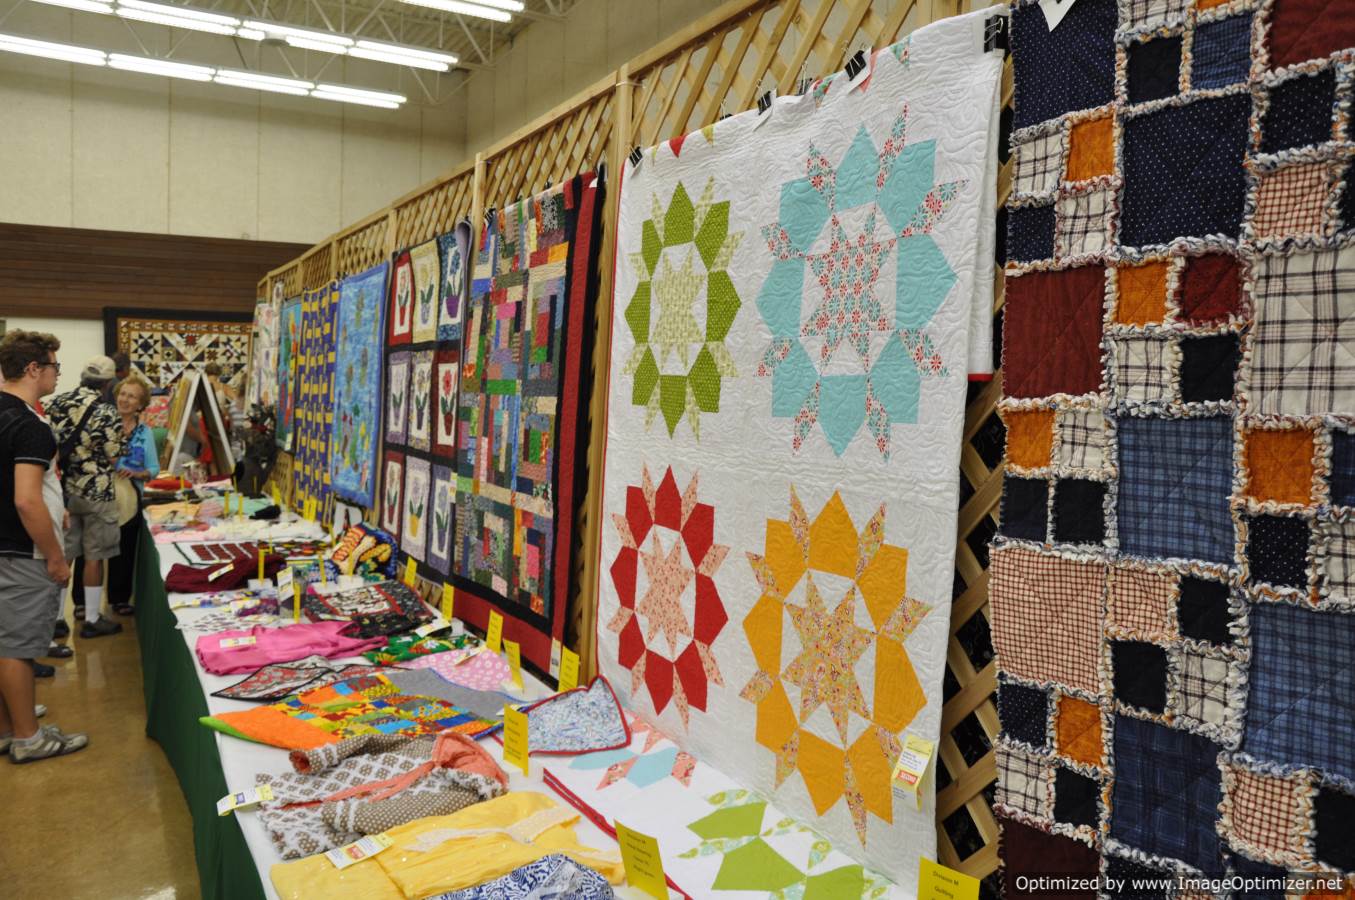
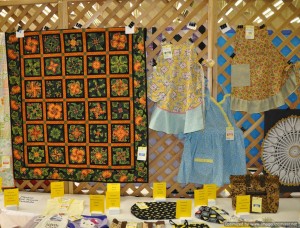
The Quilt and Sewing Section.

DSC_0638

More exhibits.

Dana with Baking

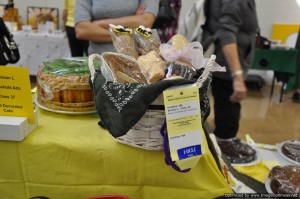
DD with her gift basket entry.

Dana's HoneyBee and Honey Theme - Cookies with honey

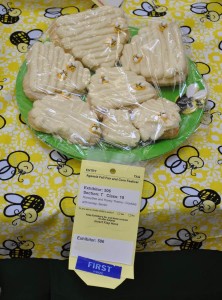
DD’s HoneyBee themed cookies.

Dana's HoneyBee and Honey Theme - Muffins with honey

DD’s HoneyBee themed muffins.
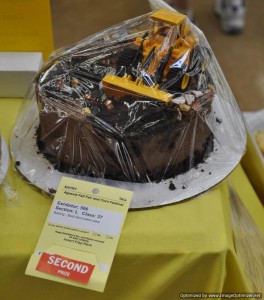
DSC_0627

DD’s cake.

Dana's Baking - Gift Basket with 4 baked items

DSC_0632

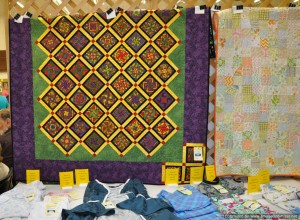
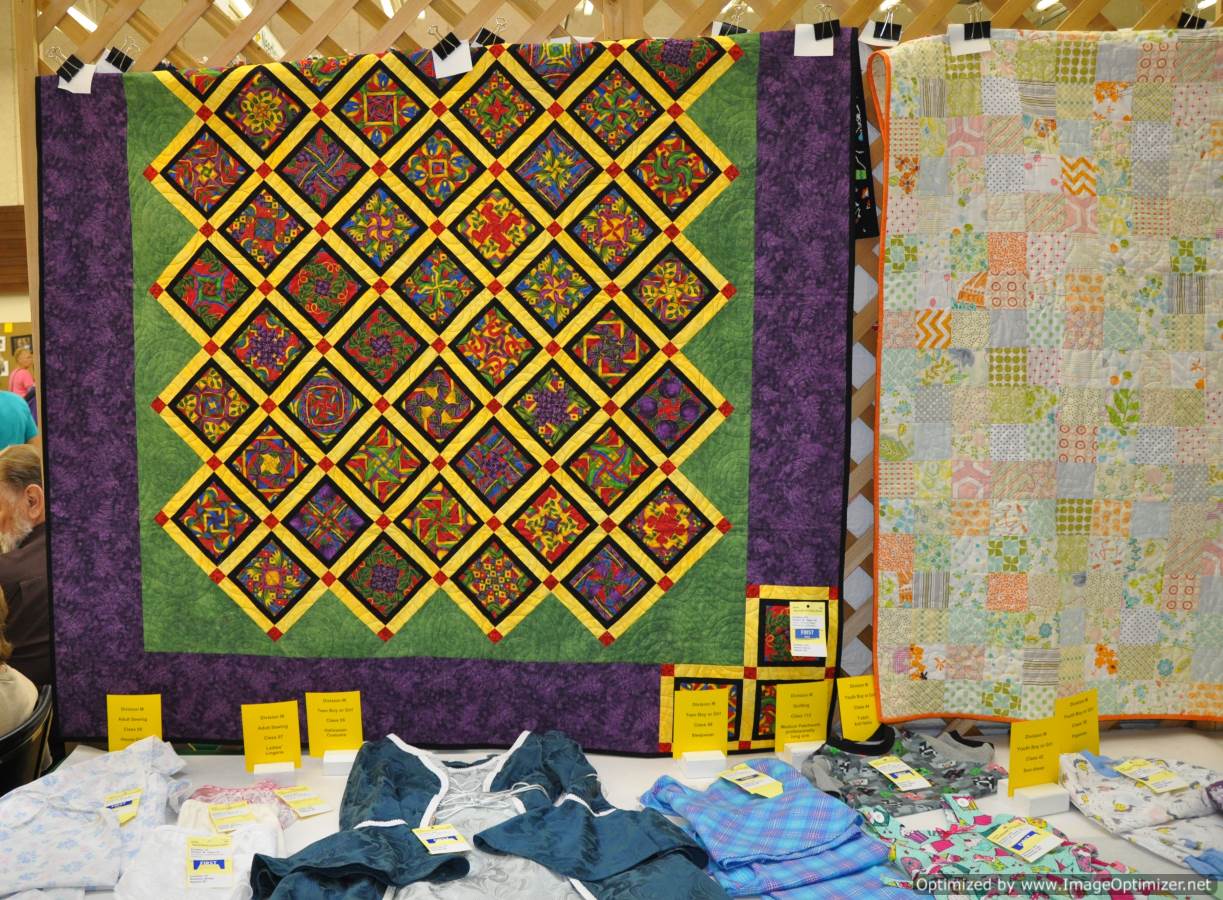
My quilt on the left – Mexican Tiles.

DSC_0633

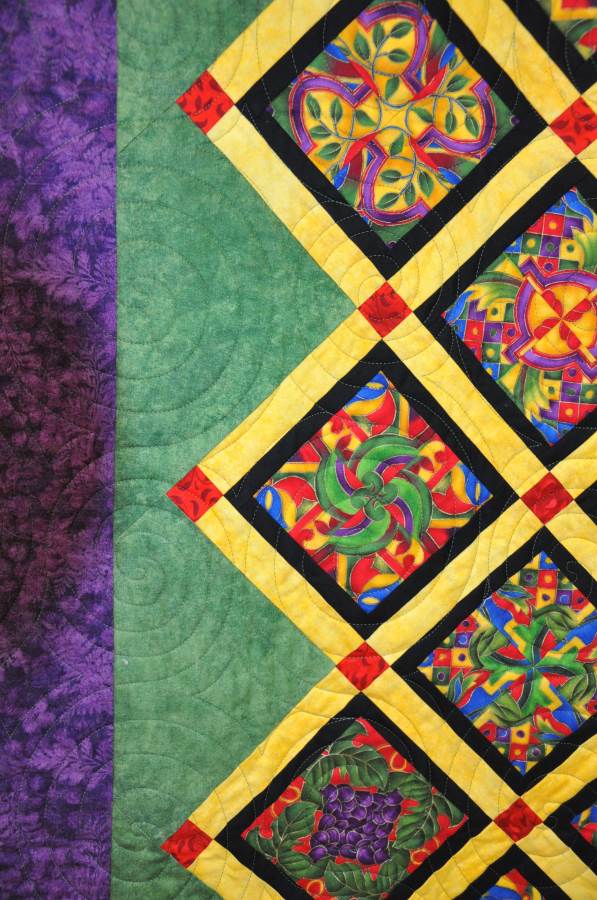
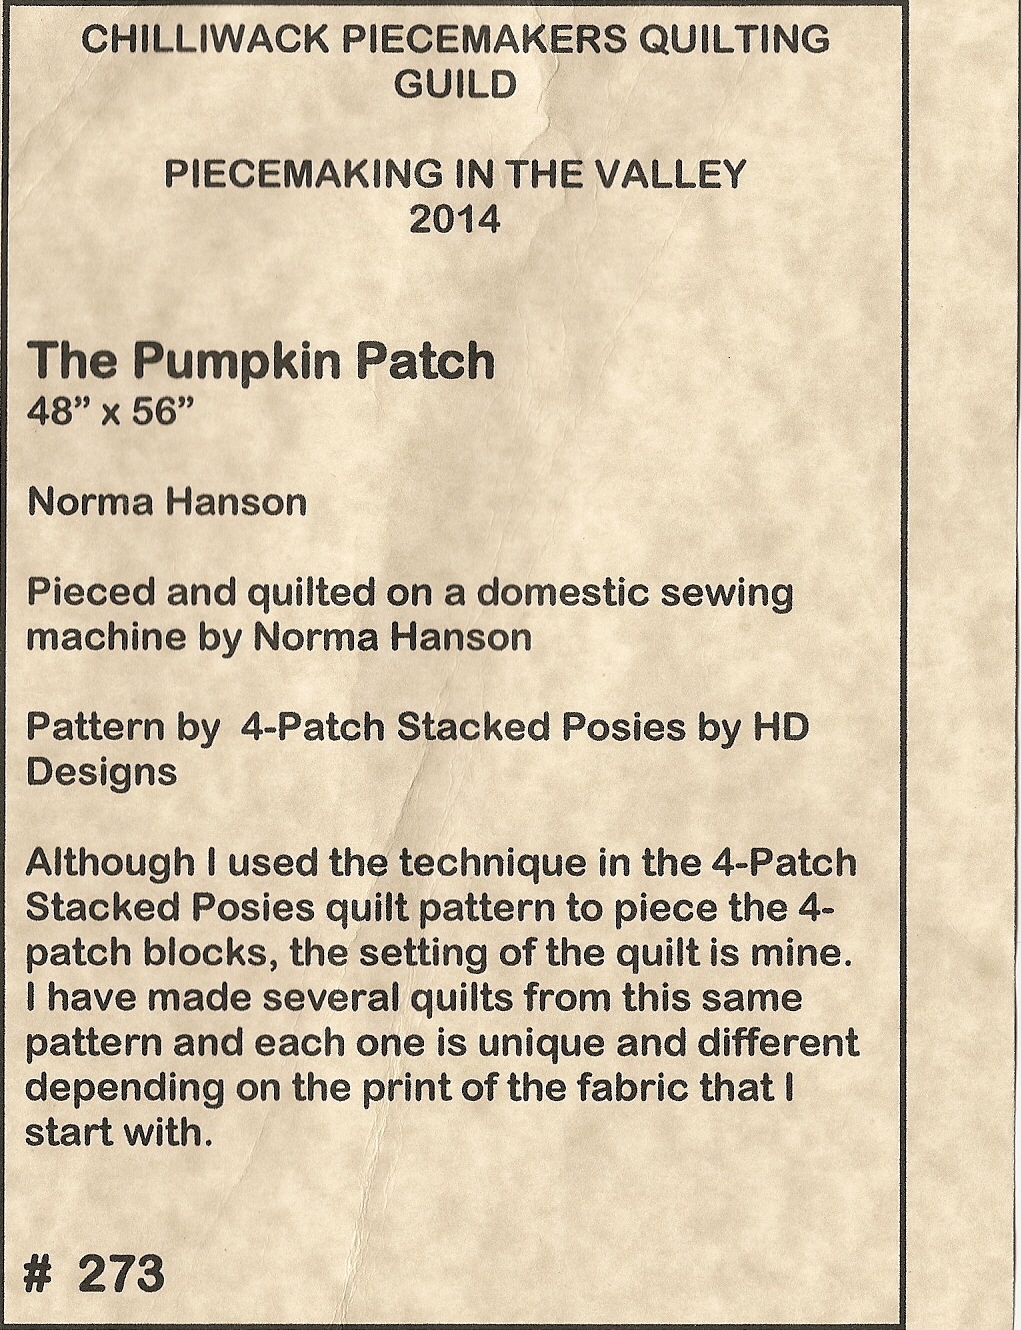
My quilt on the left – Pumpkin Patch.

The quilt blocks for both Mexican Tiles and Pumpkin Patch are made using the technique in HD Design’s quilt pattern, 4-Patch Stacked Posies.  The setting of the blocks is my own design.  Mexican Tiles was quilted on my long arm using the Loricircles’ Swirls pattern board and Pumpkin Patch was quilted on my Bernina using vertical lines spaced about every 1/2″ or so.

DSC_0635

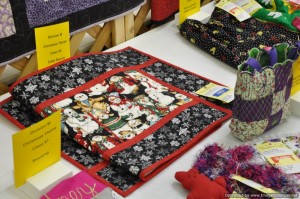
My Snowman Table Runner.

My Snowman Table Runner is made from the Designs to Share With You pattern, It’s Fast, It’s Easy.

DSC_0636

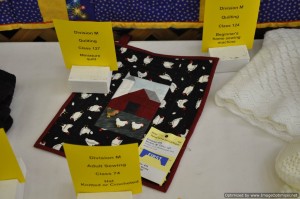
My Miniature Quilt – Chickens in the Farm Yard.

My Chickens in the Farm Yard quilt is made from a paper piecing pattern that was in a Miniature Quilts magazine years ago.

DSC_0637

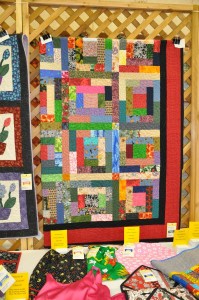
My quilt – Crayon Box.

My Crayon Box quilt is one of Bonnie Hunter’s free quilt patterns by the same name.

Norma's HoneyBee and Honey Theme - Needlework Picture

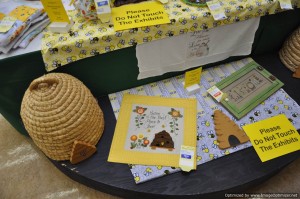
HoneyBee Themed Challenge.

Norma's HoneyBee and Honey Theme - Needlework Picture - Large

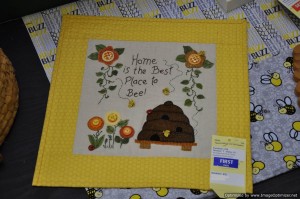
My quilt – HoneyBee Themed Challenge – Home is the Best Place to Bee!

My HoneyBee challenge quilt was made from an out of print pattern that I picked up at a quilt show garage sale table for 25 cents earlier this Spring.  The pattern is called, “Bee Home Pillow – 105” from Bird Brain Designs.  My quilt measures 17.5 inches square.

DSC_0646

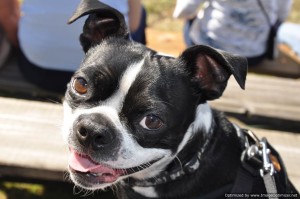
Sarge – DD and DSIL’s dog.

My husband and I were able to puppy sit for the evening on Saturday night while our daughter and son-in-law attended a wedding.
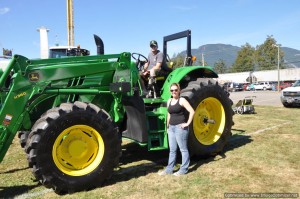
DSC_0655

A Deere family.

Our son-in-law is a John Deere fan so I couldn’t resist taking a “family” picture with the tractor.

By Sunday morning when we got up, almost all evidence of the fair was gone.  The Midway had packed up and moved on and all the tents and exhibits were removed from the field behind our house.  This year’s fair is now only a memory.  …looking forward to next year!

Challenges

I am working on two quilting challenges right now.bee-Optimized

1.  The first  challenge is with our local Fall Fair.  This year is our 110th Fall Fair and our 66th Corn Festival.  The theme of our local fair is, “Year of the…Honey Bee!”.  In conjunction with the theme of the fair, our local fair committee issues challenges in the categories of needlework, quilting, baking, and canning in keeping with that year’s fair theme.  Under quilting, the challenge is to make a, “Fall Fair Theme Quilt – using the honey bee theme.  Any size.  Open to all age/groups.”  When I was at the Langley Quilters Guild show in May, I shopped in the guild’s boutique and picked up a used applique pattern for $0.25 that I think will work perfectly for this challenge.

download

2.  The second challenge is with our local quilt guild.  This year our quilt show is October 17 and 18.  The theme of the challenge is, “Roses are Red, Violets are Blue.”  The rules for this one are:

– Each challenge piece must include at least one rose and at least one violet.  Feel free to add more if you want.

– Your challenge piece must be no larger than 96 inches around or if you want it square, it is 24 inches by 24 inches.

– You are free to include any fabric or technique you wish, piecing, applique, photo transfer, beading, ink-work, embroidery or ???.

I have the pattern and two of the fabrics that I want to use for this one. I am still on the hunt for one more fabric and then I can start the piecing.

I can’t show pattern or fabric details for these challenges at this point as we are supposed to be keeping details a secret until unveiling.  …so stay tuned!

Abbotsford Quilt Guild’s Quilts in the Valley Show

This weekend, the Abbotsford Quilters’ Guild is hold their show, Quilts in the Valley.  I headed to the show yesterday.  The following are some of the quilts that caught my attention.

This quilt is Hanging Garden by Cozy Quilt Design.  I have seen this quilt done before but never in a scrappy version.  Of course the quilting on this one was fabulous too!

DSC_0679-Optimized This was an original design.  This one caught my eye–likely because of the recent triangle workshop I attended.DSC_0681-Optimized This quilt is from the pattern Mesmerize by Natalia Bonner.

DSC_0682-Optimized This quilt was from Glorious Patchwork by Kaffe Fassett.DSC_0685-Optimized I could make this one today as I recognized many of the floral fabrics in this one as being in my stash as well!  I think someone has been collecting floral fabrics for as long as I have!DSC_0687-Optimized This quilt made me smile.  It depicts so many typical fall, winter, and spring days here on the coast.  I love the brightly coloured umbrellas that brighten the otherwise grey day.  The quilting on this one was perfect.  You really get the feeling that it is raining.DSC_0695-Optimized This quilt was in the Quilts of Valor booth.  The bluework blocks were definitely Canadian and really caught my eye.  DSC_0697-Optimized These quilts were completed as part of the guild’s Scrappy Stars Mystery.  The pattern source is Save The Scraps by Gayle Bong.DSC_0711-Optimized DSC_0712-OptimizedThis quilt was getting a lot of attention.  The maker raw edge appliqued the circles.  But before she did that, she pinked the edges.  The quilting on this one definitely made the quilt.  The pattern source was Quilts and More, Bubble Up by Sachiko Aldous.
DSC_0714-OptimizedScrappy quilts always get my attention.  The source given for this quilt was just Quilters Newsletter Magazine.  Too bad the designer was not credited as this was a fabulous quilt.
DSC_0719-Optimized DSC_0720-Optimized While at the show, I sat through a demonstration on the Split Nine Patch quilt.  This block is so effective in lights and darks.  The gal demonstrating said that she was inspired by a picture of a similar quilt on Pinterest.  Who of us has not been inspired by Pinterest!  🙂DSC_0723-Optimized My favorite quilt of the whole show was actually this one.  The quilt maker worked together with her father who upholstered furniture for a living.  The two of them worked together on this quilt…even as her father was diagnosed with cancer and went through treatments.  The chair was finished and one week later her father passed away with cancer.  What a fabulous memory of her father!DSC_0724-Optimized DSC_0726-OptimizedThere were a lot of vendors at this show and I found a couple of things to purchase.  I can’t show any photos of my purchases as they are part of the two challenges I am working on.  There were a lot of other things that tempted me, but all I had to do was think about the many projects on the go at home already and I was able to walk away without buying anything new.