Random Reflections – The Start of a New Quilt

This morning, Quilters Newsletter Magazine’s Facebook post stated that, “March is National Quilt Month! It’s the perfect time to start a new project, or maybe finish one of those UFOs (or PIGS – Projects in Grocery Sacks – as Lori would call them).”

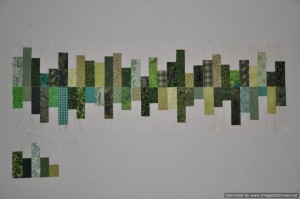
So in keeping with National Quilt Month, I did start a new project yesterday.  The pattern is called Random Reflections and is by KarrieLyne from Freckled Whimsy.  The pattern is available on the Moda Bake Shop site and is free for the downloading.  This quilt should finish approximately 60″ x 60″ and will be perfect as a lap quilt.

I picked this pattern because the darker strips resemble books on a shelf.  This quilt is for someone who loves to read and who has included books as decorations in her wedding planned for later this year.

2014_Feb 28_Random Reflections for Lindsay_started Feb 28, 2014-OptimizedAll fabrics in this quilt are from my stash.  So although I promised myself I wasn’t going to start anything new until my stack of flimsies was done, I can rationalize starting this new project because at least I was not out there buying new fabric to add to the stash.  …somewhat of a compromise.  🙂


Worldwide Quilting Day

2013-Worldwide-Quilting-Day-250_gif_150x150_q85

I spent Worldwide Quilting Day in the best way possible – in the company of quilters at a quilt show!

My Quilt Guild arranged for a bus to transport 45 quilters for a day at the Quilters Anonymous 32nd Annual Quilt Show in Monroe, Washington.

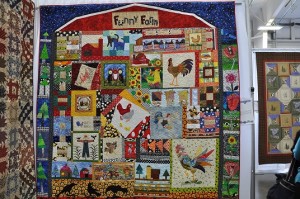
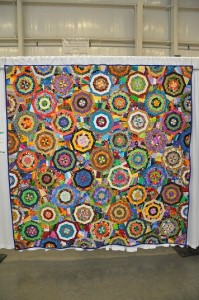
There were over 500 quilts on display at this show so picking just one favorite was impossible.  These are some of my favorite quilts from that show:
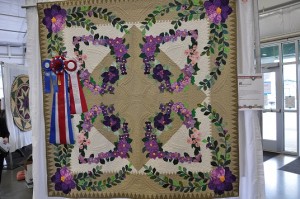
DSC_0280_smaller DSC_0315_smaller DSC_0319_smaller DSC_0343_smallerThere were quite a few vendors at the show.  These are the purchases that I made:
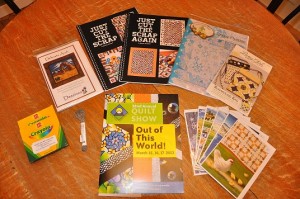
DSC_0359_smaller

Dee of The Quilted Trillim  was in attendance with her realistic raw edge applique designs. Dee told me that with her no tracing applique technique, I should be able to make her Delicate Arch project in a weekend.  There are many tiny pieces in this pattern so I don’t think I will be making this one that quickly!
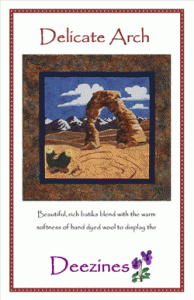
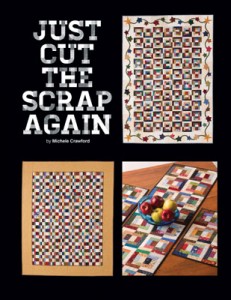
DELICATE-ARCH-250Michele Crawford of Flower Box Quilts was in attendance with her husband.  I was really impressed with the simplicity of the two blocks – Block A and Block B – that are behind the design of the quilts in Michele’s two books.  Once you make the two blocks the quilt designs are developed by sub-cutting those two blocks.  Very clever!  Michele indicated that she is now working on a third book in this series.
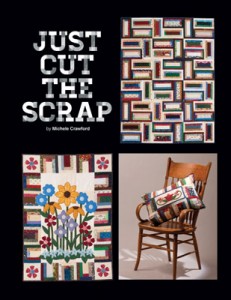
book1cover309x400webbook2cover309x400web

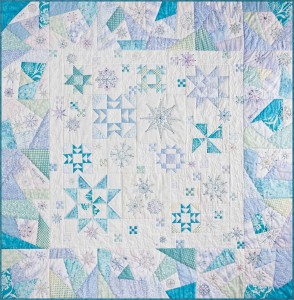
This is a picture of the cover of the pattern:  Snow Flurries.  This is a new design by Crabapple Hill Studios that I have been looking to make.
431-snowflurries-web

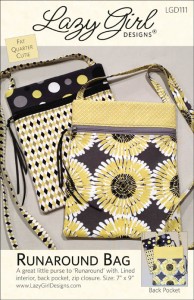
This is the pattern jacket from the Lazy Girl Designs’ bag pattern, Runaround Bag.
111-cover-2012_web

I also picked up some art cards by Rebecca Parker, two boxes of just white crayons, and some sparkle floss.  I attended a demonstration about how to colour stitchery pieces with crayons where I learned that you should first colour an area with white crayon before adding the layer of coloured crayon.  This technique is described by Crabapple Hill Studio on their website as:

Crayon Tinting instructions

Some of the patterns are tinted with Crayola Crayons. It’s a really fun technique that looks SO COOL when it’s done right!!! I like to start the process by coloring any area that’s going to be tinted with white crayon. It sort of “fills” the weave of the fabric and smooths it out to create a base for the colored crayons. It also helps with the blending of colors……….SO!!! You can go through quite a bit of white crayon in a single project. In “Calendula Patterdrip’s Cottage” I used almost 3 white crayons. Having to buy another ENTIRE box of colored crayons just to get one, single, lousy white crayon is just, well……maddening! But….having a little box of all white on hand…..is…..happy-ing! Yes, that’s a new word.

Color tinting is really easy……

  1. 1. Trace the design onto the fabric as usual
  2. 2. Make sure your work surface is clean and smooth and there isn’t any lint/threads on the back of the fabric.
  3. 3. Color all areas that you’ll be tinting somewhat heavily with white crayon.
  4. 4. Tint all areas as directed in the pattern (or use your own imagination!) I like to use a little circular motion……..
  5. 5. Heat set with a hot iron by laying a white paper towel over the tinted area and pressing (you’ll smell the wax) Remove the paper towel and look at it…..if there’s ANY color on it repeat the pressing process with a clean paper towel.

In the same demonstration I learned about a metallic look embroidery thread called, Cosmo Sparkle Thread.  I learned how adding a bit of sparkle floss to a stitchery project can add just a little special something to your project.  The Snow Flurries pattern that I bought uses sparkle floss, and crayons so I will be able to try out the new techniques that I just learned.

From Lecien’s website:

Lecien has been producing Cosmo embroidery thread in Japan since 1950. Cosmo thread is made from the best grade of Egyptian cotton available and its texture and sheen is equal to that of silk. Cosmo floss doesn’t twist and tangle like other flosses, and is easy to separate the strands for stitchery projects. Cosmo thread glides smoothly through fabric.

Opening and Using Sparkles

To use Sparkles – do NOT pull an end like you would with other flosses. Gently remove the paper sleeve. Handle gently and keep the loops in nice circles. Find where the knot is; these 2 ends are the ends of the 10 meter strand. Open the loop twice, until all that is holding the loops together is the knot. Gently pull the 2 ends of the strands till the knot is away from the loops and cut the knot. Carefully wind Sparkles around a spool or bobbin.

Today was the perfect way to celebrate Worldwide Quilting Day!
 

International Quilting Weekend

Saturday, March 21, 2009 was National Quilting Day in the US. I noticed another Canadian blogger who referred to Saturday as INTERNATIONAL Quilting Day and I feel a little like her and think this should be more than an event limited just to the US. Given all the good that quilters do worldwide for their communities, we should be recognizing quilting world wide and the day should be changed to International Quilting Day!

I told my mother that it was International Quilting Day and she asked me what I was going to do. I told her that I was going to quilt of course! And quilt I did. I joined http://catsnqlts2.blogspot.com/ in a Move It Forward Challenge. We challenged one another to pick a UFO and move it forward from pieces of fabric sitting in a box on the shelf to at least the flimsy stage.

Friday night I had put the finishing stitches in a quilt that Linda and I had worked together on previously – on Super Bowl Sunday in 2008. As I quilted Linda’s quilt I thought about the fun we had making our quilt tops together–Linda in the southern US and me in Canada, connected only through our computers and the Internet. What fun we had planning our quilts and working together through some of the challenges of the pattern. We ended up with a flimsy each. I quilted my Bargellobowl quilt last weekend and this weekend, I finished up Linda’s Bargellobowl quilt. Linda’s quilt is large–approx. 90 inches square. This quilt was so large that my daughter’s arm span was not large enough for her to act as the official quilt hanger. So for the picture, we put the quilt on the floor. As you can see, Joey is walking the border, doing his customary quilt inspection.

Once the pictures were taken, I packaged up the quilt and headed off to the post office. Linda’s quilt is now on its way back to her. It still seems surreal that the quilt that had only existed as pictures on the Internet up until now was actually in my hands, thousands of miles away from where it was pieced. Linda’s quilt is full of memories–there are fabrics in there from the FAB stashes, her Mom’s stash, and it now has my quilting stitches holding the sandwich together. So I started the Move It Forward Challenge by helping a fellow FAB move her flimsy one step closer to being a finished quilt.

The next project I tackled was taming the overflowing unruly box of string pieced rectangles that I have been working on over time. When I am looking for a mindless project to do where I don’t have to match anything or concentrate much, I work on string piecing scraps to used Color Catcher sheets. Once I have a stack, I trim them up to 4″ x 9″ .

These are the stacks of blocks that I trimmed up on Saturday. Each stack is at least 3″ high. Linda asked me what I had planned for these blocks. I was just going to sash and cornerstone them into a simple top. Linda asked if I had thought of making a Railroad Crossing quilt.

After searching the Internet for ideas and swapping pictures of quilts back and forth, I came across a quilt with pink and tan alternating squares that I fell in love with. It wasn’t long and Linda sent me this EQ drawing of a quilt similar to the one that I fell in love with. With this drawing it is easy for me to figure out how many squares of what fabric I need and just how many of the string pieced bits that I need. It is obvious to me now that I have enough string pieced bits to make about three of these quilts!
This is very typical of what happens when Linda and I get together and start discussing quilts and quilting. We start with one idea and the next thing you know the pattern ideas are flying back and forth over the Internet and we both have a few more quilts added to our Quilting To Do list! It is great to have someone to bounce your ideas off of.


The UFOs that I decided to move forward were my Easter table toppers. This first topper is for me. It was previously just a flimsy and Saturday I managed to get it quilted. Sunday I machine stitched the binding to the front of the quilt. That pink strip around the perimeter of the topper is the binding ready to be hand stitched to the back of the quilt.


This second topper is for my Mother. The fabrics are those that my mom bought while we were on our recent trip to Arizona. I managed to piece and quilt this topper on Saturday. This topper is also ready for the hand stitching of the binding to the back of the quilt.


This is a picture of the cute fabric that is on the back of both toppers.
The members of my local Monday night quilt group have decided that they would like to make some quilts together. We have picked Bonnie’s Scrappy Trips pattern. I have decided to make my quilt out of fabric in my stash. I have a huge collection of floral fat quarters that I am cutting 2 1/2″ strips from for this project and 4 1/2″ strips from for a future project – Terry Atkinson’s
Daisy Chain. While putting together this first block on Sunday night, I remarked to Linda that maybe I should make the center squares on my blocks out of green fabrics in order to tame some of the chaos caused by all the florals that I am using. I was asking Linda what she thought of my idea.

Before I knew it, Linda had drawn up this diagram in EQ to give me some idea of what my idea might look like.
So, what started as National Quilting Day ended up as International Quilting Weekend! It is great to celebrate time to quilt together with friends – no matter where they live!

Busy Times

I haven’t posted in two weeks, but I have been busy working on quilting projects.

After working on my first Convergence quilt with the FABs on March 8th, I decided to make a second Convergence quilt the following day. This is my Sunflower Convergence.

I love the formula of using a large floral print fat quarter and three contrasting fabrics drawn from the colours of the print fabric to make this quilt pattern. I use up what extra floral fabric I have left from the fat quarter on the border and then pull one of the solid fabrics from the center to finish off the border. This is the second Convergence using this method of fabric selection and I just love how it turned out!

I ended up quilting this piece 2 1/2 times. I had it half quilted and I didn’t like the thread so I picked it out, then I fully quilted it and didn’t like the quilting design so I picked it out, then I quilted it for the last time which is the design you see now with the “sun’s ray’s” coming from the upper right hand corner.

Friday, March 14th was my Mother’s birthday. This is the Spring/Easter table center that I finished for her using the Spiral quilt pattern I have shown before.

And this is the Birthday Girl posing with her cake.

Saturday, March 15th was National Quilting Day. Did you know that the third Saturday in March is officially designated as National Quilting Day? Quilters love a celebration – especially when fabric is involved – so over the years, observance of National Quilting Day has unofficially been expanded to the whole month of March! To read more about National Quilting Day, follow this link: http://www.nqaquilts.org/NatQuiltDay.html

I celebrated National Quilting Day by working on my We Care quilt –started during our guild workshop on March 1st. (see earlier post)

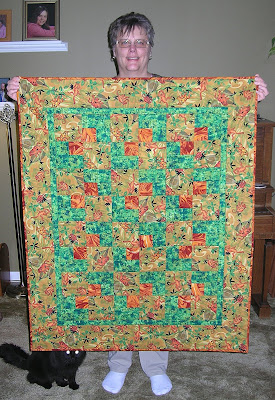
This is me with my We Care quilt. My daughter took the picture just before I left for my guild’s monthly meeting on Wednesday night. Look who decided to get in on the picture taking — peeking out from behind the quilt!

I loved the fabric on the back of this quilt–dragonflies!