
My quilt guild is hosting another UFO challenge. We have to take our UFO’s to the guild meeting next week and show them in their current state and then register them for the challenge. This past weekend I went through a bin of my UFO’s to decide which UFO’s I would focus on for the challenge.
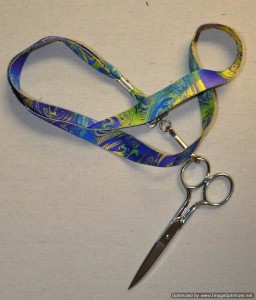
One of the UFO’s in the bin was a wool project in a Ziploc bag. The bag appeared to contain everything I would need to complete the project–all the wool, thread, needles, marking pencil, templates, pattern, pins, pin cushion, and what was that? My good scissors? Yes, there were my long lost Gingher scissors. It appears that my scissors had been added to the project bag some time ago to make this project ready to “grab and go”. However, it seems that I never grabbed this project to work on it in years. I have been looking for my Gingher scissors for years – since the fall of 2009 to be exact. I never gave up searching for them as I would periodically take a box off the shelf and go through the contents thinking that the scissors may have fallen into it at some point by mistake. But lo and behold, there were my scissors–lanyard still attached (The lanyard was attached to make the scissors harder to misplace. Maybe I need to add something larger than a breadbox to the handles next time.)
The wool project is a wool Dogwood pennyrug kit. The Pacific Dogwood was adopted in 1956 as British Columbia’s floral emblem. The Pacific Dogwood is a tree that grows six to eight meters high and flowers in April and May.
I think the reason that I never finished this wool project was that the thought of tracing around the templates onto the wool was a bit of a fiddly idea to me and not as portable as I would have liked for a “grab and go” project. Fast forward some years to today. I have renewed interest in this project since watching some Quilt Roadies videos on YouTube. Anna, aka Woolie Mammoth, is a fan of working with wool and she has compiled a few videos on working with wool, including how she prepares her wool projects for working on as she travels.
Anna uses a product called, SF101 which is a fusible interfacing product made by Pellon that she irons to the back of her base fabric. SF101 not only provides stability for stitching her project, but Anna says it allows her to “travel” with her thread on the back of her project without breaking the thread and having to start again somewhere else with a new knot. SF101 prevents the threads from the back of the project from showing through to the front of her project.
Anna also uses a product called, Soft Fuse which is a fusible that can be ironed to the back of her wool pieces to attach them to her background–no pins!
Anna says that she starts stitching on the smaller pieces. She uses a whip stitch on the smaller pieces and then she goes back and does a buttonhole stitch on the larger pieces. Once Anna is finished doing the whip stitching and buttonhole stitching she goes back and adds any fancy texturing stitches that she wants to further embellish her project with.
With a goal of May 2019 through my guild’s UFO challenge, and these tips from Anna I have renewed energy to pick up this old project and complete it.


