The Great Granny Bag

Our modern guild meeting was Thursday, February 8.  Our annual guild destash usually takes place at the January meeting.  Because many members were unable to make the January meeting because of a snow storm / freezing rain, we had Part II of our annual destash at our February guild meeting.

At destash night, members bring any usable items from their sewing rooms that they no longer have use for and put them out on the tables for other members to adopt for free.  After all, one person’s junk is another person’s treasure, right?

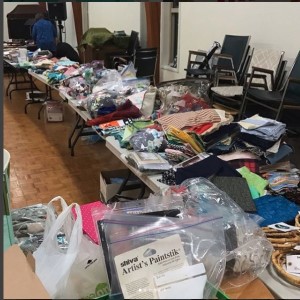
Tables loaded with items from members' studios - destash night.

Tables loaded with items from members’ studios – destash night.

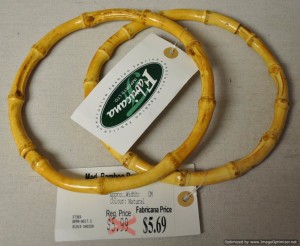
The tables were loaded!  In the bottom right hand corner of the photo (above) you can see some bamboo purse handles.  Another member and I each picked up a pair of these round bamboo handles.

Bamboo handles

Bamboo handles

After some discussion and joking around, a challenge was born – first person to finish a bag with their handles and post a picture to the guild’s Facebook page…

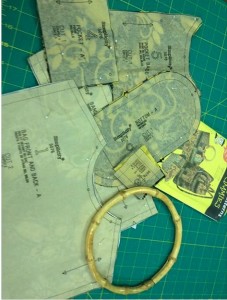
I worked the next day so I couldn’t start my challenge right away.  My challenge partner – Christine – is retired and she was able to start her bag immediately – Friday morning.  When I got home from work on Friday there was a picture to taunt me on Facebook with the caption, “Pattern cut, now to sew.  How is your bag coming along?”

Christine's bag in progress

Christine’s bag in progress

I got up early Saturday morning and got to work on my bag.  I worked through the day, checking Facebook frequently to make sure Christine hadn’t finished her bag yet.  I managed to finish my bag late in the afternoon and I got a picture of my finished bag posted to our guild’s Facebook page before Christine.

In the end, I am not sure who really won the challenge.  Although I was first to post a picture of a finished bag, Christine outdid me by finishing a total of 6 bags before she called it quits.

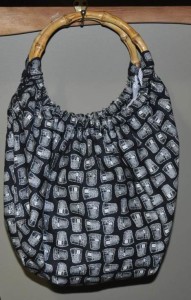
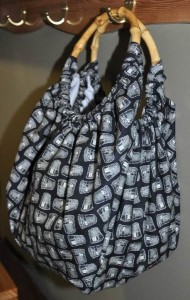
My bag was The Great Granny Bag which is a free bag tutorial on Emmaline Bags’ blog.

The Great Granny Bag

The Great Granny Bag

The Great Granny Bag - side view

The Great Granny Bag – side view

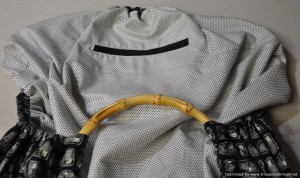
I modified the pattern by including a zippered pocket on the inside of the bag.  This was a new-to-me technique.  I made 2 pockets (not intentionally) before I got it right.

The Great Granny Bag - inside with zipper

The Great Granny Bag – inside with zipper

This  bag will be perfect for transporting projects-in-progress as it is very roomy inside.  The elastic on the sides gives it almost unlimited expansion room.

Thank you to whoever provided the bamboo handles on the destash table – they provided entertainment for a friendly challenge and the beginning of a very useful bag!

Because Christine and I were posting our progress to our guild’s Facebook page, other members were watching with interest.  The member who organized our destash night made a comment about being inspired to create a challenge for next year – January destash and February challenge.  It sounds like we can look forward to some more fun next year in conjunction with the destash.


Worldwide Quilting Day

2013-Worldwide-Quilting-Day-250_gif_150x150_q85

I spent Worldwide Quilting Day in the best way possible – in the company of quilters at a quilt show!

My Quilt Guild arranged for a bus to transport 45 quilters for a day at the Quilters Anonymous 32nd Annual Quilt Show in Monroe, Washington.

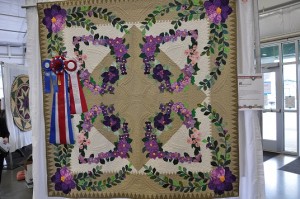
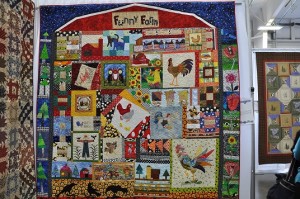
There were over 500 quilts on display at this show so picking just one favorite was impossible.  These are some of my favorite quilts from that show:

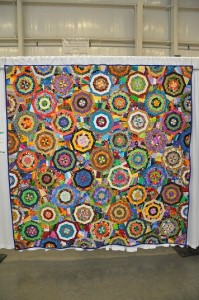
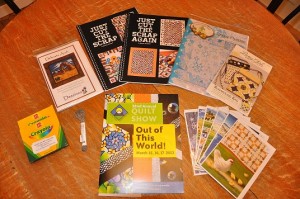
DSC_0280_smaller DSC_0315_smaller DSC_0319_smaller DSC_0343_smallerThere were quite a few vendors at the show.  These are the purchases that I made:

DSC_0359_smaller

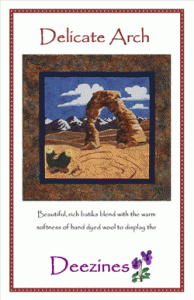
Dee of The Quilted Trillim  was in attendance with her realistic raw edge applique designs. Dee told me that with her no tracing applique technique, I should be able to make her Delicate Arch project in a weekend.  There are many tiny pieces in this pattern so I don’t think I will be making this one that quickly!

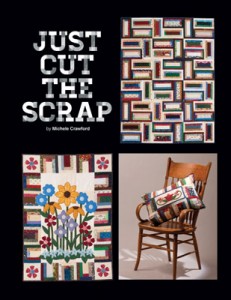
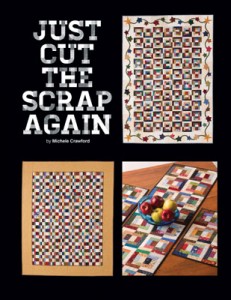
DELICATE-ARCH-250Michele Crawford of Flower Box Quilts was in attendance with her husband.  I was really impressed with the simplicity of the two blocks – Block A and Block B – that are behind the design of the quilts in Michele’s two books.  Once you make the two blocks the quilt designs are developed by sub-cutting those two blocks.  Very clever!  Michele indicated that she is now working on a third book in this series.

book1cover309x400webbook2cover309x400web

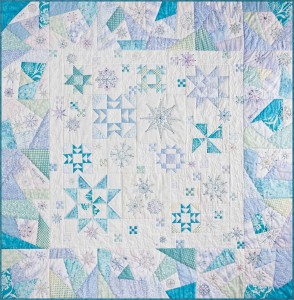
This is a picture of the cover of the pattern:  Snow Flurries.  This is a new design by Crabapple Hill Studios that I have been looking to make.

431-snowflurries-web

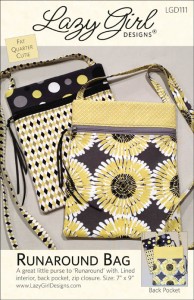
This is the pattern jacket from the Lazy Girl Designs’ bag pattern, Runaround Bag.

111-cover-2012_web

I also picked up some art cards by Rebecca Parker, two boxes of just white crayons, and some sparkle floss.  I attended a demonstration about how to colour stitchery pieces with crayons where I learned that you should first colour an area with white crayon before adding the layer of coloured crayon.  This technique is described by Crabapple Hill Studio on their website as:

Crayon Tinting instructions

Some of the patterns are tinted with Crayola Crayons. It’s a really fun technique that looks SO COOL when it’s done right!!! I like to start the process by coloring any area that’s going to be tinted with white crayon. It sort of “fills” the weave of the fabric and smooths it out to create a base for the colored crayons. It also helps with the blending of colors……….SO!!! You can go through quite a bit of white crayon in a single project. In “Calendula Patterdrip’s Cottage” I used almost 3 white crayons. Having to buy another ENTIRE box of colored crayons just to get one, single, lousy white crayon is just, well……maddening! But….having a little box of all white on hand…..is…..happy-ing! Yes, that’s a new word.

Color tinting is really easy……

  1. 1. Trace the design onto the fabric as usual
  2. 2. Make sure your work surface is clean and smooth and there isn’t any lint/threads on the back of the fabric.
  3. 3. Color all areas that you’ll be tinting somewhat heavily with white crayon.
  4. 4. Tint all areas as directed in the pattern (or use your own imagination!) I like to use a little circular motion……..
  5. 5. Heat set with a hot iron by laying a white paper towel over the tinted area and pressing (you’ll smell the wax) Remove the paper towel and look at it…..if there’s ANY color on it repeat the pressing process with a clean paper towel.

In the same demonstration I learned about a metallic look embroidery thread called, Cosmo Sparkle Thread.  I learned how adding a bit of sparkle floss to a stitchery project can add just a little special something to your project.  The Snow Flurries pattern that I bought uses sparkle floss, and crayons so I will be able to try out the new techniques that I just learned.

From Lecien’s website:

Lecien has been producing Cosmo embroidery thread in Japan since 1950. Cosmo thread is made from the best grade of Egyptian cotton available and its texture and sheen is equal to that of silk. Cosmo floss doesn’t twist and tangle like other flosses, and is easy to separate the strands for stitchery projects. Cosmo thread glides smoothly through fabric.

Opening and Using Sparkles

To use Sparkles – do NOT pull an end like you would with other flosses. Gently remove the paper sleeve. Handle gently and keep the loops in nice circles. Find where the knot is; these 2 ends are the ends of the 10 meter strand. Open the loop twice, until all that is holding the loops together is the knot. Gently pull the 2 ends of the strands till the knot is away from the loops and cut the knot. Carefully wind Sparkles around a spool or bobbin.

Today was the perfect way to celebrate Worldwide Quilting Day!


First Finish for 2010

This is my first finish for 2010!

This isn’t a quilt, but I am counting it as a finish anyway.

This bag was made a week ago as an early birthday present for my mom. I have made these bags before, but this is the first time I have made one with a zipper top.

The base of the bag is denim and the straps are webbing–going all the way down the side of the bag. The materials used make this a sturdy bag that will withstand heavy items such as books.

Happy Birthday Harold and Brenda!

Yesterday we attended a surprise birthday party for my husband’s sister. She turns 60 on the 8th. My husband was surprised when there was a cake there for him too.


I made this bag for my SIL for her birthday. The bag is called, Farmer’s Market Tote and is from Terry Atkinson’s book, Let’s Do Lunch. My version is made from pastel batiks and is heavily quilted with straight lines. I love Terry’s patterns because they turn out just like the pictures in her book–no surprises!

This Quilt Has Handles

Our guild sponsored a workshop last Saturday. The workshop was called, “This Quilt Has Handles” and the instructor was Carola from Carola’s Quilt Shop in Gibsons, BC. The workshop was not so much about the article that we were going to make – a purse – but about quilting and embellishment techniques that we could use on other projects.

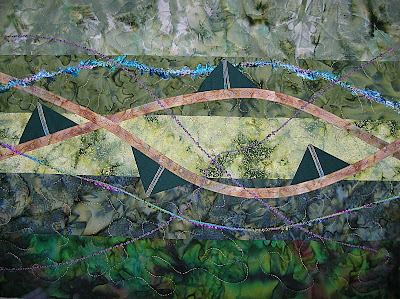
These are pictures of my 2 quilts so far–one quilt for the front of the bag and the second quilt for the back of the bag. My quilts are still minus the handles and the finishing part, that is why they are still two flat pieces.


You can see the techniques we worked on–free motion quilting, prairie points, bias strips, decorative stitching, yarn couching, and bobbin work. I did not get to practice putting beads on by machine during class, but I will take the time to practice that technique before doing the final steps to assemble my bag.


This is a picture of the steps to making prairie points from a strip of fabric. We cut our fabric strip 2″ wide. The instructor used a serger loaded with decorative variegated thread to add a rolled hem to one long side of our strips. (top of photo)
We then re-measured the strips and cut the strips into pieces twice as long as the width of our strip. (middle of photo)
Once we had our rectangles, we folded the sides of the rectangle to the center and pressed. (bottom of photo)
This technique allows you to make prairie points that end up being only two thicknesses of fabric–more suitable for adding to embellished garments or quilts rather than the traditional prairie points made from four thicknesses of fabric.