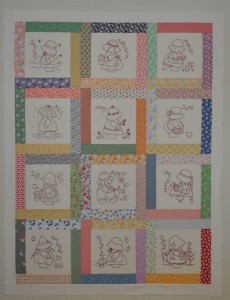
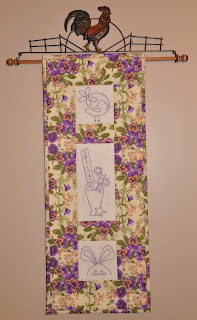
I couldn’t stand it. Yesterday I thought I had my Sunbonnet Sue Redwork quilt finished to the flimsy stage, but the red border that I had on it just wasn’t working for me. So after staring at this quilt top on the design wall for the morning, I decided to just remove that red border. I think that red fabric was a little too heavy and overpowering for the blocks. Here it is, in its revised finished flimsy stage – now measuring 44 in x 57 in. I will go ahead and add this one to the “to be quilted” pile.
Category Archives: red work
Two Finished Flimsies
This is Labour Day weekend here in Canada so that means a three day weekend! What better way to spend it than sewing?
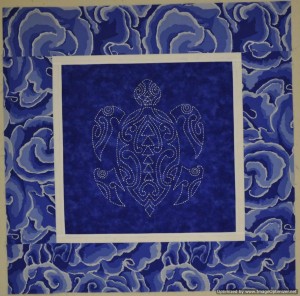
I have been trying to catch up on some of the UFO’s that have been languishing on the shelves of my studio. First up, I added borders to my Hawksbill Honu Sashiko piece. The turtle is a Sylvia Pippen Design. In April 2013, our quilt guild brought Val Wojutla to our monthly meeting for a trunk show of her work. The following day, Val stayed to teach a Sashiko class to our membership.
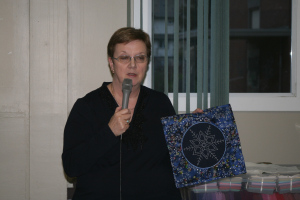
Val Wojutla Trunk Show – April 2013 – Val is holding the class sample for the workshop she taught the following day.
Unfortunately, that class was on a weekday during the busiest month of the year at work for me so I was unable to take the class. I bought the Honu piece as a kit at one of the vendor booths at a subsequent quilt show. I also purchased the pattern for the snowflake that Val taught during her workshop. I haven’t started stitching that snowflake yet.
The fabrics on the borders of my Honu piece were not part of the kit. The blue outer border print is a Kaffee Fassett fabric.
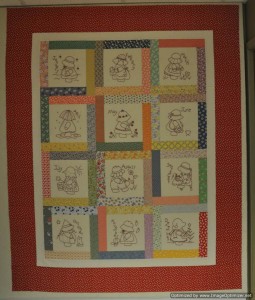
The second flimsy that I finished today was my Redwork Sunbonnet Sue. I am not so sure I am totally sold on the outer border. Next time, I may just forego the borders altogether. However, the borders have brought it up to 56″ x 69″ which would be a nice size for some little girl’s bed.
The pattern is by Mary Ellen Von Holt of Little Quilts. The original pattern makes a quilt that finishes 22″ x 28″. I don’t do “that small” so I enlarged the designs so that they fit nicely within a 9″ finished square.
Unfortunately, I did not record when I started stitching these blocks. I received the patterns for the blocks in November 2010. I don’t remember if I started stitching on the blocks right away, but it would have been soon after that time. I stitched my blocks using DMC pearl cotton number 8, colour 498. (I just realized that DMC pearl cotton has dye lot numbers. I have two skeins of colour 498 and they are DEFINITELY not the same red!) My mother started a similar set of blocks in January 2014 using many different colours of floss. It will be interesting to see how her blocks turn out.
So that makes two more flimsies for the “to be quilted” pile.
My Newest Redwork Project
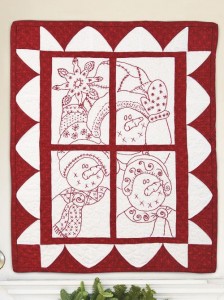
My newest red work project is, Snow Happy by Pearl Louise Krush. The pattern was in the Holiday 2013 issue of The Quilter Magazine.
 This is a picture of the finished quilt from The Quilter magazine’s site.
I am trying something new with this project–Sticky Fabri-Solvy from Sulky. This product is a self-adhesive, fabric-like, water soluble stabilizer.
I ordered my product from Bird Brain Designs a while ago and I was anxious to try the technique described on their site. (http://www.birdbraindesigns.net/sticky-fabri-solvy). From the Bird Brain Designs site:
Do you hate to trace designs for your needlework projects? We have the solution for you – Printable Sticky Fabri-Solvy from Sulky! Print your design with your copier, stitch your design and dissolve the film away in a generous amount of warm water…EASY & ACCURATE.
Sticky Fabri-Solvy is a printable stablizer film in a full 8 1/2″ x 11″ size making printing more accurate! Just print your design on your home copier/printer right onto the sheet of Sticky Fabri-Solvy. Copy your design onto the “film” side of the Sticky Fabri-Solvy. Peel the paper backing away and finger press the printed film directly onto your fabric. Add your embroidery hoop and get stitching in just minutes! The easiest, fastest way to transfer designs for embroidery, applique and needle felting.
Remove the film easily from your finished embroidery. (See the photo above.) Place in your sink with running warm water adding a generous amount of warm water. You can “swish” your embroidery with your hand to hasten the dissolving process. I run clean water from the faucel over my design and dry flat on a bath towel.
Stitch as usual following the design on the printedSticky Fabri-Solvy. EASY! We tried it for RedWork embroidery on muslin and on wool for Needle Felting and Embroidery. When your stitching is completed, cut away excess Sticky Fabri-Solvy and soak the project in warm water to melt the remaining film away…..NEAT.
Sticky Fabri-Solvy is a full 8 1/2″ x 11″ so it fits into your copier paper tray perfectly making printing quick and easy and accurate.
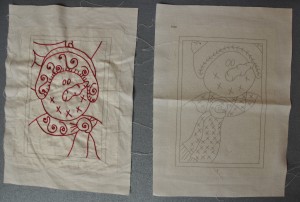
This image is my project. The block on the right is my Kona White fabric with the design photocopied to the Sticky Fabri-Solvy product. The block on the left has been stitched. It is a bit wrinkly now as I found the stabilizer added enough body to the fabric that I didn’t need to hoop my project for stitching. It does mean however, that my project gets a bit wrinkly. 🙂 Removing the Sulky product from my finished project was easy. A little water in the sink and a bit of agitation and it was all gone!
I used DMC’s perle cotton No. 8 in colour 498. I love the perle cotton–no more separating floss threads–you can use it right off the ball. When I was in AZ, I found a new perle cotton thread by Presencia (No. 16). This product is finer than the DMC that I used in this project. I am planning to use it in a more detailed design where a thinner thread than the DMC perle cotton would be more appropriate.
For reference, I found the following video on You Tube that describes how to use the Sulky Fabri-Solvy product: “How to Transfer and Stabilize an Embroidery Pattern”.
In a second video, the deisgner describes and illustrates using a stabilizer–Pellon Designer’s Lite–to the back of your embroidery design. The stabilizer in this video is ironed in place, stays on the back of the design, and does not wash away. I have not yet tried this but I want to hang onto this information for future reference, so here it is: “Embroidery How to for Quilt Pattern, I Believe in Snowmen by Bunny Hill Designs” This video is also a great resource for how to get started with red work.

