One of the blogs that I read on a regular basis is Joyce’s blog over at J’s Quilting Blog: http://jdebreuilsartandquilts.blogspot.com/2008/08/when-all-else-fails.html. Joyce is a fellow Canadian quilter living on the prairies in a neighbouring province to where I was born. Yesterday morning when I checked in to see what Joyce was up to, she had made the comment, “When things don’t go well in the studio, my policy is to start something new.” I thought about that and decided to adopt that as my policy for the day.
I previously posted that I was unsure if my BQ2 needed borders. I had secretly decided in my head that I was going to most likely end up putting borders on that quilt (I rarely go without borders as much as I seem to stall at putting them on.). The majority of comments that I received confirmed that, yes, that quilt did need borders. The prospect of spending the day putting on boring borders was not inspiring or motivating to me. So, yesterday, I adopted Joyce’s policy and started something new.
I pulled out a box that was labelled. “4 Patch Stacked Posie”. I remembered that I had a 4 Patch Stacked Posie quit started that was sitting unfinished, but for the life of me I could not remember what the fabric looked like. When I opened the box, I found that all the four patch blocks were complete, they just needed to be set together. OK, I didn’t really start something totally new, but it was new to me for a second when I couldn’t remember what it looked like (must be a sign that I have too many UFO’s when I can’t remember what they look like!).
The 4 Patch Stacked Posie pattern, http://www.hddesigns.net/default.aspx?sectionid=1756&pageid=3671 calls for 1″ cut strips to border the 4 patch blocks before adding sashing and corner stones. I have made two quilts using that method and vowed that I would never do that again–life is just too short! I am not signing up for more of that insanity.
I was unsure of how best to set my blocks (which is why they were likely still sitting in the box). I headed over to one of my favorite resources for inspiration, http://www.webshots.com/
I found a quilt by Mary Lou with 49 blocks–just the exact number of blocks that I had–that looked simple enough. Mary Lou set her squares on point and eliminated that nasty 1″ border around each square, moving straight to the sashing and cornerstones. http://home-and-garden.webshots.com/photo/2628819070061648096aQTfwn
With inspiration in hand, I auditioned some fabric choices for the sashing and corner stones and ended up with what I had originally chosen months ago when I had put the blocks away in the box. It felt good to confirm my original choices though.

Please excuse the perspective of this picture. I put the quilt on the floor to take my picture. My new design wall, aka garage door, is unavailable this morning. DD’s car is parked in the driveway where I would stand with my camera to take the picture. DD is still in bed sleeping. In her defense, she has been putting in a lot of 11 pm to 7 am graveyard shifts at work so I am not going to wake her to move her car.
I spent the better part of yesterday putting together my quilt top. The designer of this pattern suggests that you split your fabric (4 repeats of the design) down the middle lengthwise ending up with two pieces of fabric 4 repeats long by 20 to 22″ wide. The first half of the fabric is what you make your blocks from and the second half of the fabric is what you save for your outer border. I was prepared to burn the midnight oil last night to get the final border on this one, but I stopped at 11:00 pm because in this case, this border fabric was just screaming at the quilt top.
 It didn’t look like a good idea last night at 11:00 pm to put this on as an outer border and it didn’t look like any better an idea this morning. I think the final border for this one will be the same green that was used in the corner stones.
I am not sure if I will loose what is left of this print on the back of this quilt somewhere or if I will save this piece of fabric for some other project. Since I am not in a hurry to quilt this one, I have some time to think about these options.
If you are interested in the pattern for this quilt, this is the website: http://www.hddesigns.net/ I will warn you though, the pattern is very confusing. Some designers should stick to designing and forget about writing patterns. After spending some time trying to navigate this website, you might think that quilt designers should also stay away from web design. To the designer’s credit she says that, “Re-modeling of the website is being worked on! Should be ready SOON!” Hmmm….the date of the note is March 2008. It is now August 2008 and still no remodel is complete.
 This is Joey. He is sitting in one of his favorite spots. On nice mornings, I like to keep the window open and Joey appreciates being able to sit in the fresh air and check out what is going on outside.
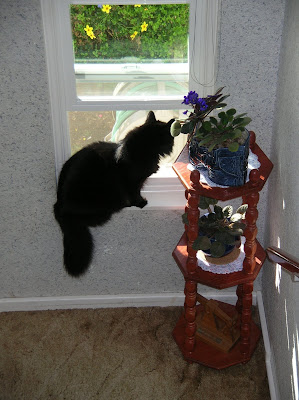 This morning, Joey was talking to his friend outside.
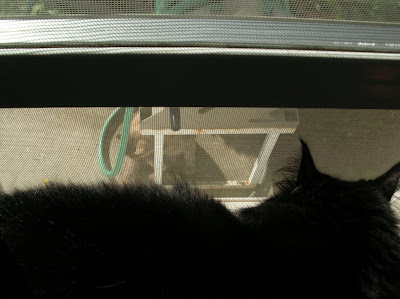
 This poor thing seems to have been abandoned. He isn’t very old–I would say only 6 months. He has decided to hang around our house. Quite often in the morning he is curled up asleep on one of our deck chairs. He spends a fair amount of time hunting in the back yard and he often checks in with Joey. There is a screen between them. I am not sure what would happen if they could actually get at each other.

 While at the show, we learned that Quilt Canada will be in Saskatoon, Saskatchewan from May 25 to 30, 2009. It is unlikely that I will make that show.
 However, we did find out that Quilt Canada 2010 will be in Calgary. Marguerite is back organizing the bus trips for the Kelowna guild and they are planning to attend Calgary in 2010. Dot and I told Lucy and Laurie to keep us in mind for 2010. If Marguerite is organizing the bus tours again, all who attend are sure to have a great time!
  Calgary, here we come!


