 This is the second project that I have worked on during my vacation. This is Paint Chips from a pattern by Karla Alexander from her book, Stack, Shuffle, and Slide.
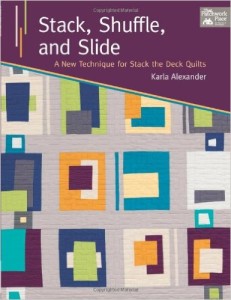
Last year while our guild was in Seattle for the Fourth Annual Pacific Northwest Modern Quilt Guild Meet Up in August, we toured Martingale’s publishing facilities. After the tour there was an opportunity to purchase some of the books published by Martingale. One of the books that I bought was Stack, Shuffle, and Slide by Karla Alexander.
This quilt definitely fits the definition of improv piecing with intention. According to the Modern Quilt Guild, “Improv does not have to be random when it comes to quilting. It is one thing to start with a bag of scraps when improvising in the sewing room, but what do you do when you’ve got an idea and want to improvise the process. It can be as simple as transferring an image or as abstract as translating an idea.”
Using Karla’s technique of stacking squares of fabric and then slicing the squares a specific number of times and then shuffling the pieces, you end up with a simple way to sew improv blocks. Karla’s pattern says to start with 10 fat quarters (18″ x 22″) and cut them into 20 rectangles measuring 11″ x 12.5″. I prewashed my fat quarters which resulted in some fabric shrinkage. When I went to cut my squares, I did not have a perfectly square fat quarter. I ended up cutting my squares less than the 11″ x 12.5″ recommended size in the pattern. This resulted in finished squares that measured 7.5″ x 9″ rather than the 8″ x 10″ rectangles that Karla showed in her pattern. I felt I had less flexibility in where I made my slices on the squares because I had started with smaller rectangles to begin with. If I were to make this quilt again, I would start working with cuts of fabric larger than a fat quarter to ensure that after prewashing my fabric I would have a large enough rectangle to start the process with.
I also eliminated the inner contrasting border. I like the look of the squares floating on the background rather than seeing them contained by that inner border.
The fun part of this pattern is making the blocks and then playing with the blocks and other bits on the design wall. Once you have made your decision on where everything is going to go, the assembly of the top is a bit tedious.
The following review of Karla’s book was completed by the Vancouver Modern Quilt Guild and gives some more insight into this book.
Reviewed by the Vancouver Modern Quilt Guild (Stacey Day)
Customer rating 5.0/5.0
I had the opportunity to review another book for the VMQG. This time around I pulled Stack Shuffle and Slide by Karla Alexander.
I am not much of an improv quilter, not by a long shot. There is something about randomly sewing things with no plan that scares me. The one time I tried I ended up with a set of fairly symmetrical blocks that looked planned. Its this reason that when I started into Stack, Shuffle, and Slide, I could not put it down. I sped through the whole thing, and re-read a couple chapters, and I enjoyed it thoroughly.
Now, I have to be honest, I had not heard of the stack the deck technique used for the projects in the book, so I was no�t quite sure what to expect. What I got was a versatile technique combining structured techniques and modern improv cutting. The result is a quilt style suitable for any quilter and experience level.
Stack Shuffle and Slide patterns can be as structured or as improv as you want. The quilts themselves are very easy to customize. In fact, Karla includes tips for fabric selection and cutting ideas at the start of each. She also gives you her inspirations and why she chose to make each quilt.
Karla writes in a friendly manner that makes the instructions easy to understand. The patterns are well written and straightforward, with plenty of diagrams and illustrations to highlight key points in the techniques.
Her quilts are the perfect combinations of styles, so I am sure anyone could find at least 3 quilts in the book that they like (Go ahead, get the book and prove me wrong!) There are 15 quilts to choose from in a wide variety of sizes, and almost all of them can be increased in size by cutting some extra blocks.
The projects for the most part are simple, there are a few that are more complex, but the instructions and diagrams are well written, so as long as you are n�ot rushing through you will be fine no matter what your skill level. The simple patterns are perfect for quick gifts or a day retreat.
Most of the quilts use smaller cuts of fabric so its really easy to pull from your stash. Prints, solids, it does no�t matter, as long as you keep to the suggested values you will keep the essence of the quilt design.
My favorite quilt is a toss up between Dot Dash Click and Simple Simon. Both have an eye pleasing aesthetic to them and I can�t wait to start pulling fabrics to see where it takes me.
Overall I would recommend Stack, Shuffle and Slide to pretty well everyone, but especially those quilters who enjoy the improv process or have always wanted to try but get stuck, like me! I think the stack the deck technique is simple enough for anyone to learn and use, and the number of patterns included means there is something for everyone. The book is easy to read and understand, the patterns are clear and well written, and her designs suggestions make it easy to tailor the quilt to suit your own personal tastes. An A+ in all categories!
Finished size: 47″ x 64.5″.


 Jenny Doan of Missouri Star says that this quilt should finish about 47″ x 56″.


