
Mondays!
6

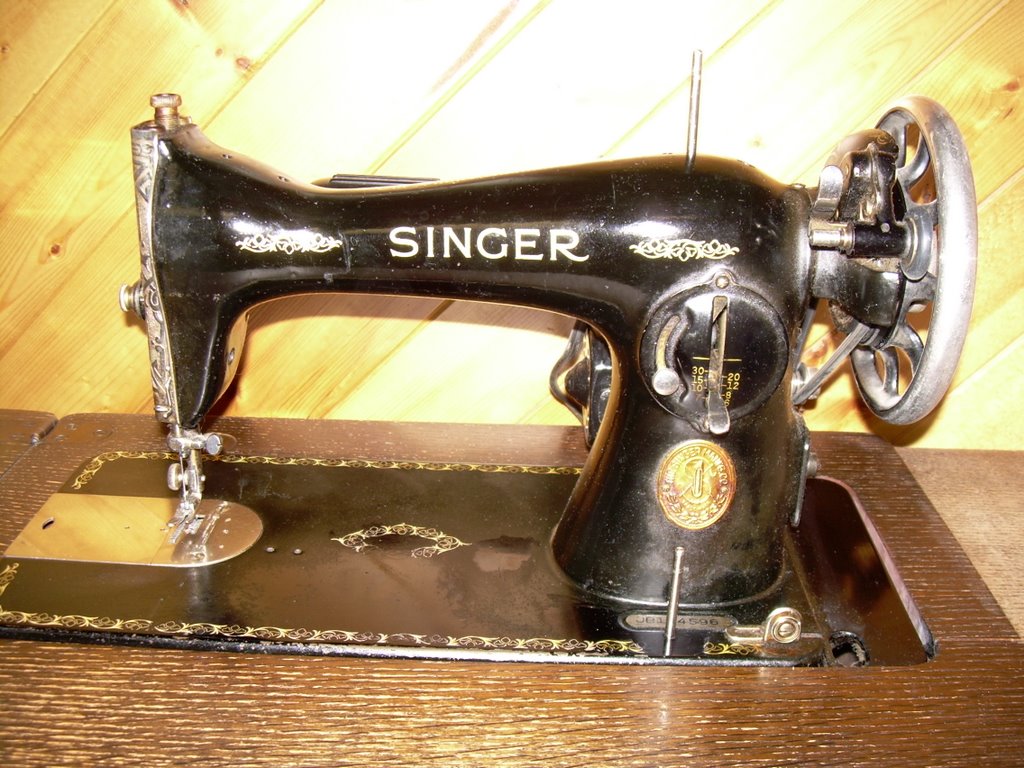 In a post back in March, I talked about the making of my first quilt – a crazy quilt that I called, Crazy About Chickens. I talked about making this quilt on my Grandmother’s treadle sewing machine. This is a picture of that machine.
While my Grandmother was still alive, she gave me her Singer sewing machine. She owned newer, more sophisticated sewing machines since the Singer, but this was my favorite. This machine has character and personality. This machine is the one that I remember fondly while growing up. I was allowed to sew at this machine when I visited with my grandparents. As I look back on it now, I guess I was helping my grandmother “stash bust”! I will never part with this machine, even though, like my grandmother, I have own more modern sewing machines. There is no machine that can sew a more perfect straight stitch than this machine!
My grandfather sold sewing machines for Singer at one time and it was while he was selling for Singer that he bought this machine for my grandmother. Sometime after purchasing this treadle machine, my grandfather converted it to electrical power. It now has a light and foot peddle. A very modern addition to a very traditional machine.
Thanks to the Singer website, you can now look up the year and location your machine was manufactured, just by cross referencing the serial number on the front of the machine.
My machine has the serial number JB134596. According to Singer, she is a French Canadian–manufactured in 1936 at Saint-Jean-sur-Richelieu, Quebec, Canada!
Today I am going to quilt! I have a day off from work so I am going to make sure I fit in something for me!
Last weekend, I was looking through my inspiration pictures that I have collected from the internet over the years and I came across a quilt that Lucy from Quilting With The Past had posted back in December. Lucy called her quilt, UFO number 5.
I am calling my version of this quilt, Double 4 Patch. (Not very creative I know, just descriptive of the block pattern.) I have decided to make my quilt from my box of pre-cut 3″ squares. This means that my blocks finish 10″ square. With 24 blocks and an outside 5″ border, my quilt should finish about 63″ x 88″. If I keep to this size range I can make use of existing fabrics in my stash for the backing–a true stash buster.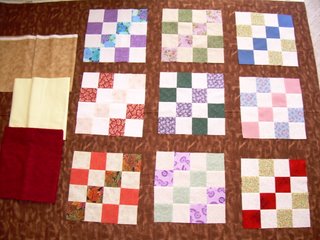 This is a picture of some of the blocks that I have made already – they are being auditioned on the fabric that I intend to use for the sashings. The three fabrics to the left are the fabrics that I am considering for cornerstones – beige, yellow, and red. I am leaning towards the yellow.
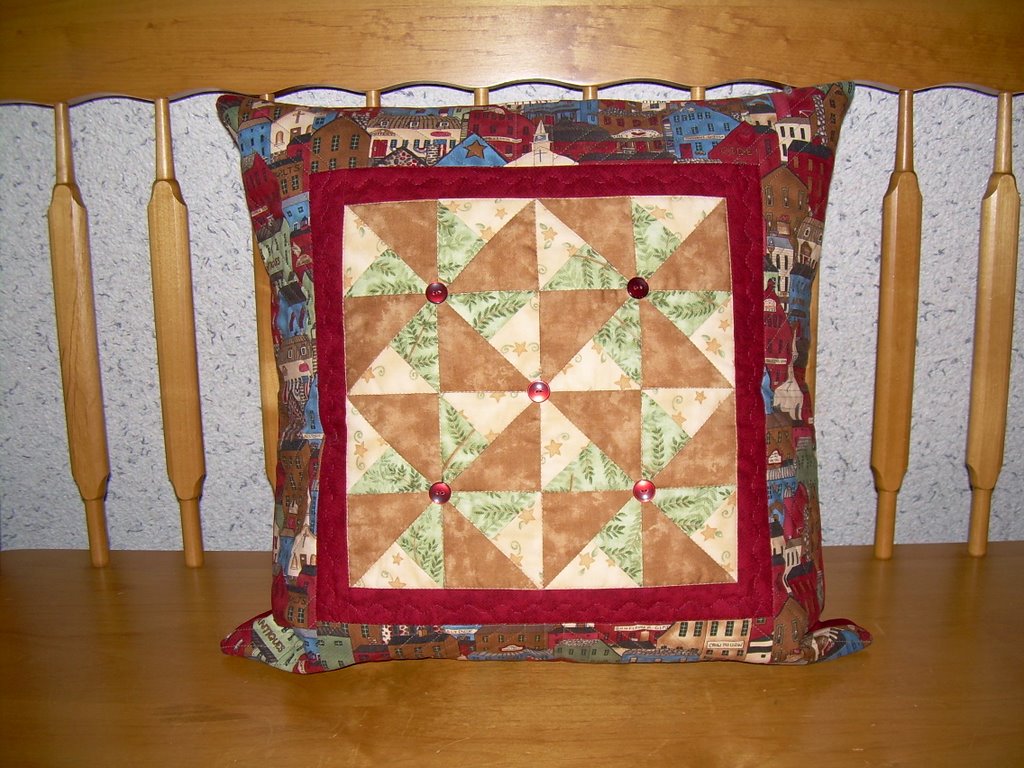 This is my completed Quilt Guild Paint Chip Summer Challenge. I made my project into a pillow. I actually finished this on Saturday but I didn’t want to post a picture until I had the pillow form and I could say it was totally complete. I was off work today and so I stopped by the fabric store and picked up the pillow form today. I had pillow forms at home–16″, 20″, and 22″. This pillow is 18″ square–the only size I didn’t have on hand at home!
I started a new project on Sunday–a double four patch from 3″ squares that I had already cut. I am off work tomorrow so I hope to finish the blocks then. I just couldn’t bring myself to work on another UFO last weekend. There must be a quilting rule somewhere about completing only one UFO per weekend!
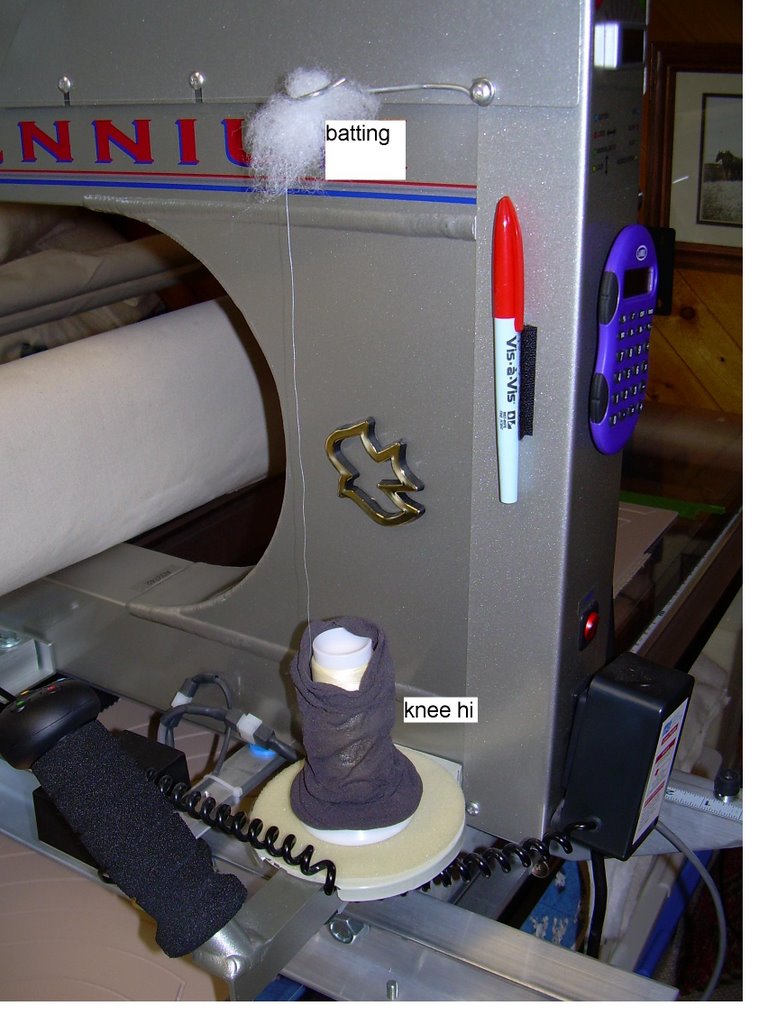
I have been working on a customer quilt all week–not because it is a difficult quilt, but because I was spending more time frogging than quilting. I was 2/3 of the way through quilting this queen size quilt when the thread started breaking and bird’s nests starting appearing on the back.
I changed the needle, changed the bobbin, changed the bobbin case, checked timing, and adjusted the tension. Nothing I tried came close to fixing the problem.
I was using Bottom Line thread in the needle and in the bobbin. This is a very high quality thread — something that has been no-fail for me in the past. My machine has always loved this thread and behaved wonderfully.
I noticed as I was quilting that the thread would feed off the thread cone fairly evenly and then it would all of a sudden loop back on itself and feed through the tension disks. I had checked everything else and not discovered the problem. Was it possible that my problem was as simple as the thread not feeding off the cone evenly?
I surfed the internet looking for other quilters who may have had similar problems. I came across a comment someone made about using a knee hi to cover the thread spool to control the thread feeding off the cone. Someone else mentioned putting a bit of polyester batting in the first thread guide.
What could I loose, so I gave both suggestions a try. What do you know–problem fixed! I have posted a picture below so that other long armers who read this blog can have a look at the simple solution that worked for me. Hopefully, I can save someone else a week’s worth of time should they ever experience the same difficulty. Note the placement of the batting in the first thread guide and the knee hi on the thread cone. Not the most attractive set up, but definitely worth repeating.
 Because of this easy fix, I finished the customer quilt tonight. Here it is….
 It is a queen size Yellow Brick Road–93″ x 110″. It feels good to have finished this quilt.
I am exhausted! It is surprising how much stress you put on yourself when you don’t understand what is causing a problem. Once the job is done and you can relax, you realize just how tired you really are.
I am going to reward myself tomorrow by working on one of my own projects in the cool of my air conditioned studio. Ahhhhhhhhh…..relief from the heat wave outside!